Quick Explain
- Plant garlic cloves pointy-side up, 2 inches deep and 4-6 inches apart, in a pot at least 12 inches deep with drainage holes.
- Fall planting (6-8 weeks before first frost) produces the largest bulbs; spring planting gives smaller bulbs but still works.
- Garlic in pots needs a cold period of 6-8 weeks below 50°F (10°C) to form a full bulb – skip this and you get green shoots, not cloves.
- Switch from a nitrogen fertilizer to a potassium-rich feed 4 weeks before bulbing to maximize bulb size.
- Harvest when 1/3 of the leaves turn brown, then cure bulbs for 2-3 weeks in a dry, ventilated spot before storage.
Garlic is one of the few crops that rewards container growers almost as well as in-ground growing – if you understand what it actually needs.
Most failures come down to three things: the wrong pot, a missed chill period, or fertilizing the same way start to finish.
This guide fixes all three. It covers every stage from choosing a variety to curing the harvest, including five points the top-ranking guides consistently skip.
If you’ve tried growing garlic in pots before and got small bulbs or no bulbs at all, the answer is almost certainly in here.
One clarification before you start: growing garlic for greens and growing garlic for full bulbs are two different projects with different timelines, light requirements, and effort levels.
The first step below asks you to decide which one you’re doing – because the entire approach changes from there.
What You Need Before You Start Growing Garlic in Pots
- A pot or grow bag at least 12 inches deep with drainage holes
- High-quality, well-draining potting mix (not garden soil)
- Seed garlic – hardneck or softneck variety suited to your climate
- Balanced organic fertilizer (10-10-10 NPK) plus a potassium source for bulbing stage
- Straw or wood chip mulch
Decide First: Are You Growing for Greens or Full Bulbs?
Most guides skip this question entirely – and it’s why so many beginners are disappointed.
Garlic greens (also called garlic shoots or green garlic) are ready in 2-4 weeks. You plant a clove, let it sprout, and snip the green tops to use like chives.
There’s no chill requirement. You can do this on a sunny windowsill year-round.
Full garlic bulbs are a different project entirely. They take 7-9 months, require a cold period (vernalization), need at least 6 hours of direct sun, and reward patience with the deep, rich flavor that grocery store garlic rarely delivers.
This guide covers both – but be clear on your goal before buying anything.
Learn More about When Should You Plant Garlic in Illinois?
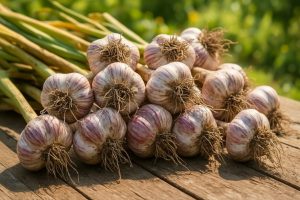
Step 1: Choose the Right Garlic Variety for Your Climate
Planting the wrong variety for your climate is the most common reason pot-grown garlic fails.
Hardneck garlic (Rocambole, Purple Stripe, Porcelain) suits cold climates in USDA zones 3-6.
These varieties need a real winter cold period and produce larger cloves with bold, complex flavor. They also produce scapes in spring – a bonus harvest.
Softneck garlic (Artichoke, Silverskin) suits mild climates in zones 7-10. Softneck varieties are more adaptable, store longer (up to 12 months vs 4-6 months for hardneck), and produce more cloves per bulb.
Elephant garlic is technically a leek, not true garlic. It grows well in pots but has a much milder flavor. Each clove produces one giant bulb – good for visual impact, mild in the kitchen.
Never plant supermarket garlic. It’s often treated with sprout-inhibitors and may carry diseases not suited to your soil.
Buy certified disease-free seed garlic from a nursery, local farmer’s market, or reputable seed supplier.
| Variety Type | Best Climate | Container Depth | Storage Life | Produces Scapes? |
| Hardneck | Zones 3-6 | 12-16 inches | 4-6 months | Yes |
| Softneck | Zones 7-10 | 10-12 inches | 8-12 months | Rarely |
| Elephant Garlic | Zones 4-9 | 14-18 inches | 3-4 months | Yes |
Step 2: Pick the Right Container
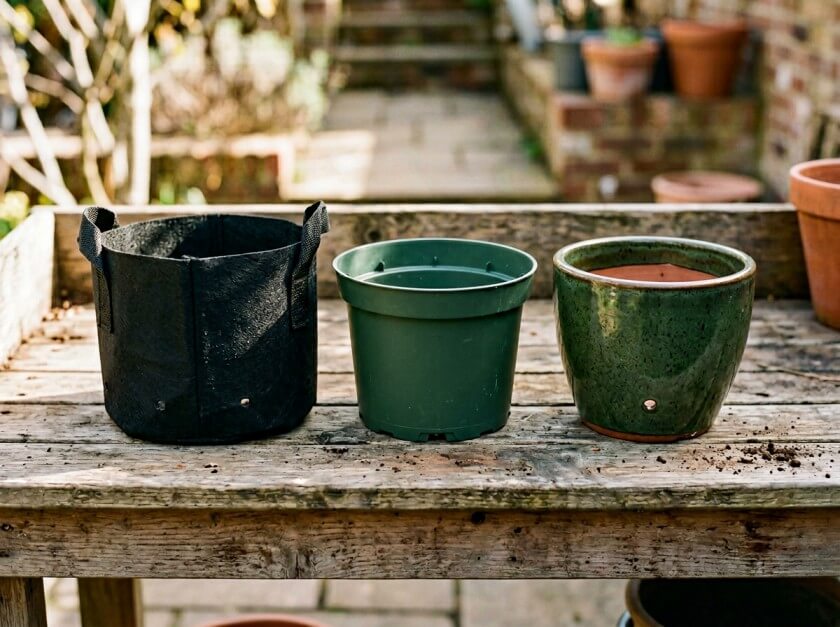
The container is where most guides give bad advice. Pot depth matters more than width.
Minimum depth: 12 inches. Many guides say 8 inches – that’s enough for roots but not ideal for bulb development. Deeper pots (14-16 inches) allow better root anchorage and produce larger bulbs.
Drainage holes are non-negotiable. Garlic rots fast in waterlogged soil. If your pot has no holes, drill them before you plant. At least 3-4 holes per pot.
Pot Material Comparison
| Material | Best For | Drawbacks |
| Plastic | Cold climates – retains heat and moisture | Can overheat in direct summer sun in warm zones |
| Grow bags | Any climate – best drainage, lightest, folds flat | Dries out faster, needs more frequent watering |
| Glazed ceramic | Mild climates, aesthetics | Heavy, can crack if not frost-proof |
| Fiberstone / plasti-stone | Cold climates, outdoor wintering | More expensive |
| Terracotta | Not recommended for garlic | Dries out too fast, cracks in frost |
Grow bags are the best option many guides ignore. Fabric grow bags allow air pruning of roots, prevent waterlogging better than any hard container, and can be stored flat when not in use.
A 5-gallon (10-12 inch) grow bag holds 4-5 cloves and outperforms most terra cotta pots for bulb size.
How many cloves per pot? Space cloves 4-6 inches apart in all directions. A 12-inch pot holds 4-5 cloves. A 16-inch pot holds 7-8 cloves. Crowding leads to small bulbs.
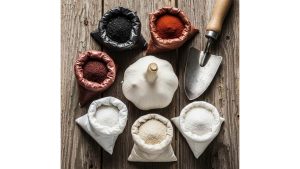
Step 3: Prepare the Right Soil Mix
Garden soil is too dense for garlic in pots. It compacts, blocks drainage, and carries soil-borne diseases.
Use a potting mix that drains freely. A good mix for pot garlic: 60% quality potting mix, 20-30% perlite or coarse sand (for drainage), and 10-20% compost or well-rotted manure (for nutrients).
Garlic needs a soil pH between 6.0 and 7.5. If you’re unsure of your potting mix’s pH, a basic soil test kit (under $15 at most garden centers) takes 5 minutes and removes all guesswork.
Do not reuse potting mix from previous allium crops (onions, chives, leeks). Fungal diseases like white rot and Fusarium can persist in old soil and wipe out a new crop before it gets started.
Step 4: Handle the Chill Requirement (Critical for Warm Climates)
Garlic needs a cold period – called vernalization – to trigger bulb formation. Without at least 6-8 weeks of temperatures below 50°F (10°C), the plant grows lush green tops but never forms cloves.
Cold climate growers (zones 3-6): Plant in fall, 6-8 weeks before your first hard frost. The natural winter handles vernalization for you.
Warm climate growers (zones 7-10): You have two options:
- Plant softneck varieties in early fall (October-November) and let the milder winters provide enough chill. Most softneck varieties need only 4-6 weeks below 50°F.
- Pre-chill hardneck varieties yourself: place unplanted bulbs in a paper bag in the crisper drawer of your fridge for 8 weeks before planting in early spring. Keep them away from apples and pears, which release ethylene gas that can damage the cloves.
Apartment and indoor growers: Bring pots indoors during the chill period but keep them in the coldest room in your home – an unheated garage or balcony works well if overnight temperatures stay above 20°F (-6°C).
If using a grow light indoors, give garlic a “dark chill period” by moving pots to a cool, dark spot for 6-8 weeks before bringing them back under lights.
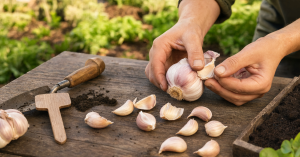
Step 5: Plant the Cloves Correctly
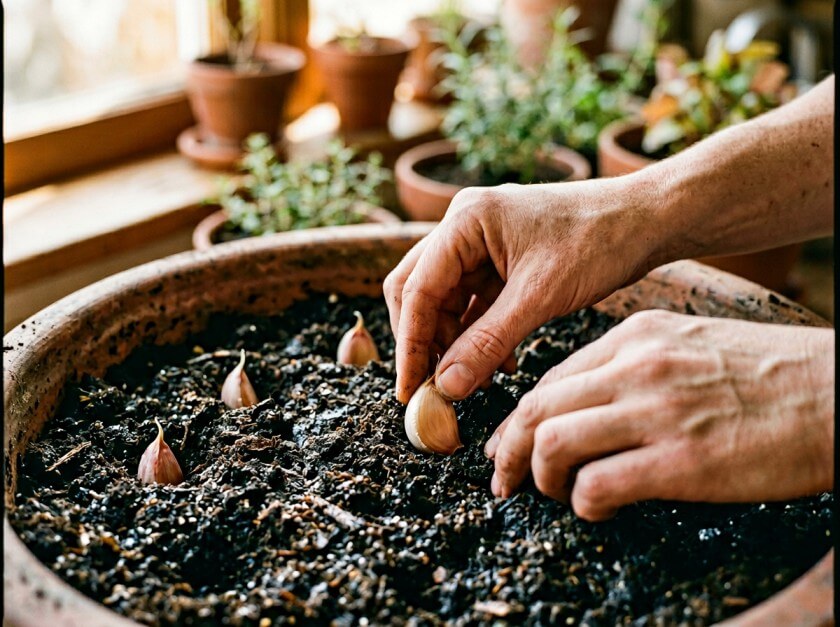
Plant in fall for the largest bulbs. Spring planting is possible but typically produces smaller bulbs because the plant has less time before the summer heat triggers premature bulbing.
- Fill your container to within 3 inches of the top with your prepared soil mix.
- Break the bulb into individual cloves just before planting – do not separate them days in advance, as the cut surface is an entry point for mold.
- Plant each clove pointy-end up, root-plate down, 2 inches deep.
- Space cloves 4-6 inches apart in all directions.
- Cover with soil and water thoroughly until water runs from the drainage holes.
- Add a 2-inch layer of straw mulch over the top. This retains moisture, moderates soil temperature, and suppresses weeds.
- Place in a spot with at least 6-8 hours of direct sun. Less sun equals smaller bulbs. This is not negotiable.
Step 6: Water Correctly Throughout the Growing Season
The watering schedule for pot garlic changes by season. Treating it the same year-round is one of the fastest ways to rot a crop.
Fall (after planting): Water once after planting. Then only if the soil dries out completely – cool temperatures mean slow evaporation.
Winter: Minimal watering. Check soil every 2 weeks. Water only if the top 2 inches are completely dry. The goal is moist, not wet.
Spring (active top growth): Water when the top inch of soil feels dry. In warm, sunny conditions, this may be every 4-5 days. In cool, overcast weather, once a week is often enough.
4-6 weeks before harvest: Stop watering almost entirely. Letting the soil dry out slightly at this stage signals the plant to stop putting energy into leaves and concentrate it into the bulb.
Overwatering this close to harvest is the top cause of split or rotting bulbs.
Water deeply when you do water – not a surface sprinkle. Pour slowly until water runs out of the drainage holes. This ensures the entire root zone gets moisture, not just the top inch.
Step 7: Fertilize at the Right Times with the Right Nutrients
Garlic in pots is a heavier feeder than garlic in the ground because frequent watering flushes nutrients out of the container soil faster.
At planting: Mix a balanced slow-release fertilizer (10-10-10 NPK) into the top 4 inches of your soil. Alternatively, add one cup of compost per 12-inch pot.
Early spring (when shoots reach 4-6 inches): Apply a nitrogen-rich fertilizer – fish emulsion or blood meal works well. Nitrogen drives green leaf growth, and more leaves means more energy for bulb development later.
The critical switch – 4 weeks before bulbing: Stop nitrogen. Switch to a potassium-rich feed like kelp extract, wood ash, or a 0-10-10 fertilizer.
Potassium drives bulb formation and hardening. Continuing nitrogen at this stage forces more leaf growth at the expense of bulb size. This is the step most guides miss entirely.
How do you know when bulbing starts? Watch the base of the plant. When the stems start to thicken and you see the soil push slightly near the base, bulbing has begun.
This typically happens in late spring (April-May in most northern hemisphere locations).
Stop feeding entirely 4 weeks before your planned harvest date.
Step 8: Harvest Scapes (Hardneck Varieties Only)
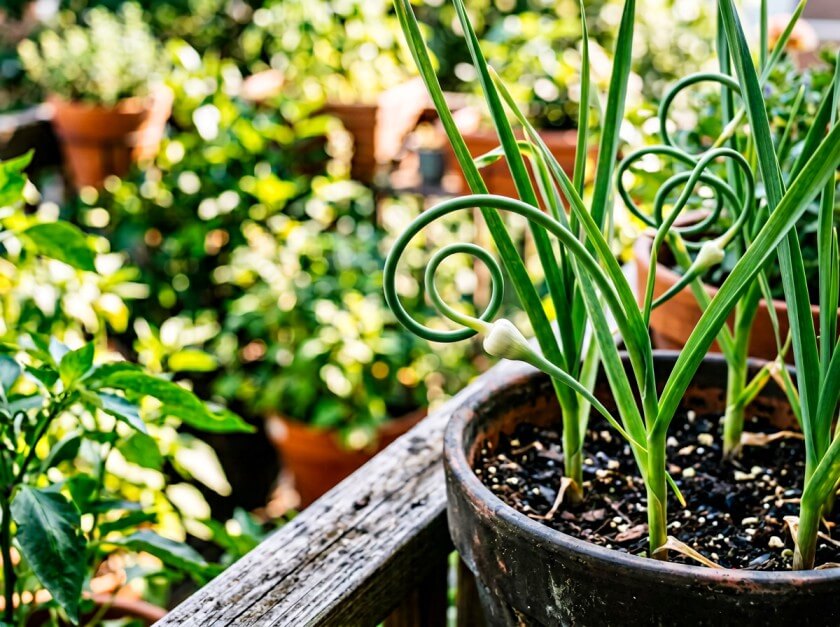
Scapes are the curling flower stalks that hardneck garlic produces in spring. Most guides say “just cut them off” – here’s the full picture.
Why cut them: Scapes left on the plant go to seed. The plant diverts energy away from bulb development into flower and seed production, reducing your final bulb size by up to 30%.
When to cut: As soon as the scape makes one full curl, cut it at the base where it meets the top leaves. If you wait until it’s curled into a second loop, you’ve waited too long.
What to do with scapes: Scapes are a bonus harvest. They taste like mild garlic and work well chopped into stir-fries, blended into pesto, used in garlic bread, or pickled. They keep in the fridge for 2-3 weeks.
Step 9: Know When and How to Harvest
Harvest timing is where years of work can be ruined in a single week.
When to harvest: Garlic is ready when 1/3 of the leaves (counting from the bottom up) have turned yellow-brown.
Each green leaf corresponds to one wrapper layer on the bulb. If you wait until all leaves are brown, the outer wrappers fall apart, the bulb won’t store, and cloves may separate. If you harvest too early, the bulb is underdeveloped.
A practical test: gently push the soil aside near one bulb. The cloves should have filled out the wrapper and feel firm. If the wrapper is still paper-thin and the cloves look compressed, wait another week.
- Stop watering 2-3 weeks before your planned harvest date.
- Loosen the soil around the bulb with a fork or trowel – do not pull by the stem, as this can snap the neck and reduce storage life.
- Lift the bulb carefully. Brush off loose soil by hand. Do not wash the bulbs.
- Set aside the largest, healthiest bulbs as seed garlic for next year’s planting.
Step 10: Cure and Store Your Harvest
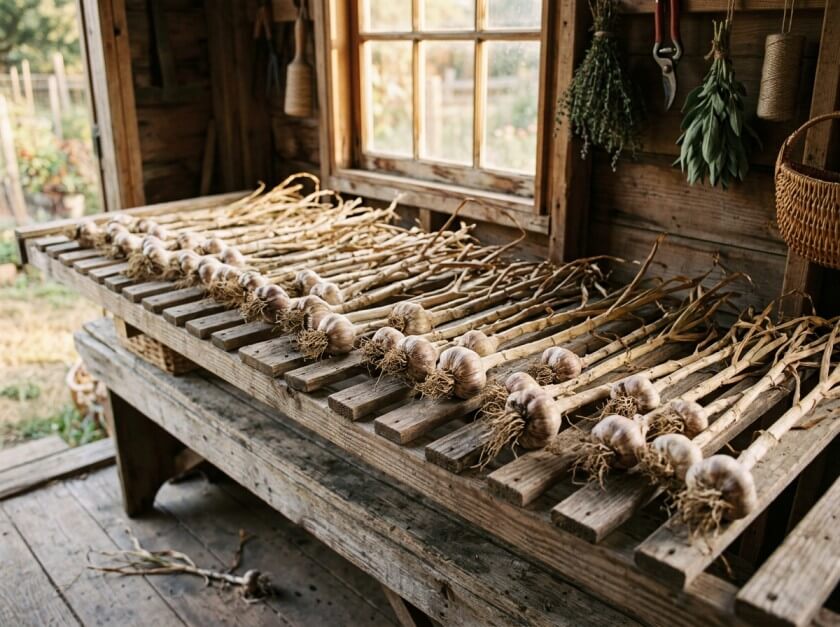
Skipping the curing step is the fastest way to lose a harvest to rot.
How to cure: Lay bulbs out in a single layer (or hang in loose bundles) in a warm, dry, well-ventilated space out of direct sunlight.
A shed, garage, or covered porch works well. Temperature should be 80-90°F (27-32°C) if possible – warmer cures faster.
Cure for 2-3 weeks. The outer wrapper will dry and turn papery. The neck will shrink and harden. At that point the bulb is sealed and ready for long storage.
After curing: Trim the roots to about 1/4 inch and cut the stems to 1 inch (or leave long stems if you plan to braid softneck varieties).
Storage conditions: Cool (50-65°F / 10-18°C), dry, and dark – a pantry, basement, or mesh bag hung in a shaded room works well.
Avoid the refrigerator for cured garlic – the cold and humidity cause it to sprout. Hardneck garlic lasts 4-6 months. Softneck lasts 8-12 months.
| Storage Method | Hardneck Life | Softneck Life | Notes |
| Mesh bag, cool pantry | 4-6 months | 8-12 months | Best general option |
| Paper bag | 3-5 months | 6-10 months | Works, slightly shorter |
| Refrigerator (unpeeled) | Not recommended | Not recommended | Causes early sprouting |
| Braided (softneck only) | N/A | 8-12 months | Decorative and functional |
You Should Know When to Plant Garlic in Colorado?
Common Problems and How to Fix Them
| Problem | Likely Cause | Fix |
| Small bulbs at harvest | Insufficient sun, overcrowding, or too much nitrogen at bulbing stage | Ensure 6+ hours sun; space cloves 4-6 inches apart; switch to potassium 4 weeks before bulbing |
| Yellow leaves in early spring | Overwatering or nitrogen deficiency | Let soil dry between waterings; apply fish emulsion if leaves are pale yellow |
| Rotting bulbs | Waterlogged soil or harvesting too early | Improve drainage; add perlite to mix; ensure pot has drainage holes |
| No bulb formation | Insufficient chill hours (vernalization missed) | Pre-chill cloves in fridge for 8 weeks before next planting |
| Stunted, malformed leaves | Nematodes or bulb mites in soil | Do not reuse soil; buy certified disease-free seed garlic |
| Fuzzy white growth at base | White rot (Sclerotium cepivorum) | Remove affected plants; discard all soil; do not reuse container for alliums for 2+ years |
| Orange spots on leaves | Garlic rust (Puccinia allii) | Improve air circulation; avoid overhead watering; remove affected leaves |
Companion Planting in Pots: The Underused Strategy
Most garlic-in-pots guides completely ignore companion planting in containers – but it works well.
Garlic produces allicin, a natural compound that repels aphids, spider mites, and soft-bodied insects. You can use this to your advantage in a large container garden.
Good pot companions for garlic:
- Spinach or lettuce – fills space between cloves during winter dormancy; harvested before garlic needs the room in spring
- Dill – does not compete significantly; the scent confuses pest insects
- Yarrow – attracts beneficial insects that control aphids
Plants that conflict with garlic in pots:
- Onions, chives, and leeks share the same pests and diseases; do not plant in the same soil
- Legumes (beans, peas) – garlic inhibits their nitrogen-fixing bacteria
- Sage and parsley – reportedly stunted by proximity to garlic in confined spaces
For winter visual interest in your garlic pot, small spinach or kale transplants fill the empty-looking surface and provide a harvest while garlic roots establish underground.
What Most Guides Don’t Tell You: 5 Gaps in Common Advice
After reviewing the top-ranking articles on this topic, here are five points almost none of them cover:
1. The fertilizer switch is the difference between small and large bulbs. Staying on nitrogen through the bulbing phase is the number one fixable mistake. Oregon State University Extension recommends shifting to potassium 4 weeks before bulbing begins (OSU Extension, 2023).
2. Grow bags outperform pots for drainage. Fabric grows bags air-prune roots, drain faster, and run cooler in summer than hard-sided containers. Most guides default to terra cotta recommendations that are actively bad advice.
3. Vernalization is rarely explained clearly. Readers in Florida, Texas, or Southern California are left confused when their garlic grows beautiful leaves but no bulb. The chill requirement is the reason – and it’s fixable.
4. Scapes have a narrow harvest window. Cutting at first curl vs. second curl makes a meaningful difference to bulb size. The timing matters and most guides give only one line to the entire topic.
5. Curing is as important as growing. A perfectly grown bulb can rot in two weeks without proper curing. Almost no guide dedicates more than a sentence to temperature, duration, and what properly cured actually looks like.
Frequently Asked Questions About Growing Garlic in Pots
Can you grow garlic in pots indoors?
Yes, with two caveats. For garlic greens, any pot on a sunny windowsill works year-round – shoots appear in 1-2 weeks and you can harvest them continuously. For full bulbs indoors, you need 6-8 hours of direct light daily (a south-facing window or a grow light on a 16-hour cycle), a proper chill period before planting, and patience – indoor bulbs are typically smaller than outdoor ones but fully edible.
What size pot is best for growing garlic?
A pot 12 inches deep and at least 10 inches wide is the practical minimum for growing full bulbs. Larger is better – a 16-inch-wide pot lets you plant 7-8 cloves and produces noticeably larger bulbs than a cramped 8-inch pot. For depth specifically, 12-16 inches is ideal; shallower than 10 inches stunts root development.
Can you grow garlic in pots year-round?
In most climates, no. Garlic has a set growth cycle tied to temperature: it needs a cold period, then an active spring growing phase, then harvest in early summer. You can stagger planting for a second harvest by starting a new pot in spring for fall harvest, but the spring-planted crop will produce smaller bulbs than the fall-planted one.
Why is my pot-grown garlic not forming bulbs?
The most likely reason is an incomplete chill period (vernalization). Garlic needs 6-8 weeks below 50°F (10°C) to switch from vegetative growth into bulb formation. If your climate is warm, pre-chill your cloves in the fridge for 8 weeks before planting. The second most common cause is insufficient light – garlic needs at least 6 hours of direct sun daily during the growth phase.
When is the best time to plant garlic in pots?
Fall, 6-8 weeks before your average first hard frost. This allows roots to establish before winter and the plant goes dormant naturally before bursting into growth in spring. In warm climates (zone 7+), late October through November planting works well for most softneck varieties.
How do you prevent garlic from rotting in pots?
Three things prevent rot: drainage holes in the pot, perlite or coarse sand mixed into the potting medium, and disciplined watering. Never let a garlic pot sit in a saucer of standing water. Reduce watering significantly in winter. Stop watering completely 2-3 weeks before harvest. Rot is almost always a drainage or overwatering problem.
Is growing garlic in pots worth it compared to garden bed garlic?
Yes, especially for variety access, pest control, and space efficiency. Pot-grown garlic lets you try hardneck varieties unavailable at any grocery store – Rocambole, Purple Stripe, and Georgian Crystal varieties have flavors genuinely different from commercial garlic. Container growing also eliminates soil-borne disease risk and gives you full control over soil quality. The trade-off is more frequent watering and fertilizing compared to in-ground growing.
Can I save cloves from this year’s harvest to plant next year?
Yes, and it’s highly recommended. Select the largest, firmest bulbs from your harvest, set them aside uncleaned, and store them in a cool, dry spot until planting time. Growing from your own saved seed garlic lets you select for plants that perform well in your specific container conditions over multiple growing seasons.
Key Takeaways
- Use a pot at least 12 inches deep with good drainage – grow bags are the underrated best option
- Pre-chill hardneck cloves in the fridge for 8 weeks if you live in a warm climate (zones 7-10)
- Switch from nitrogen to potassium fertilizer 4 weeks before bulbing begins – this single step has the biggest impact on bulb size
- Harvest when 1/3 of leaves turn brown, cure for 2-3 weeks in a warm ventilated space, then store in a cool, dry, dark location
- Scapes are a bonus spring harvest – cut them at first curl to redirect energy into the bulb