Quick Explain
- Harvesting garlic when 30-50% of the leaves on hardneck varieties have turned yellow-brown, and 60-80% on softneck varieties — leaving at least 3-5 green leaves on the plant.
- The bulb doubles in size during the final 3-4 weeks before harvest, so digging too early is the single most common mistake (Keene Organics, 2024).
- Stop all watering 2-3 weeks before you plan to harvest — this tightens the outer skins and dramatically improves storage life.
- Never pull garlic by the stalk; always loosen the soil first with a garden fork, then lift from below.
- Cure bulbs in shade with airflow for 2-4 weeks before storage; cured hardneck varieties last 3-6 months, softneck varieties 6-12 months.
What “Ready to Harvest” Actually Looks Like in Your Garlic Bed
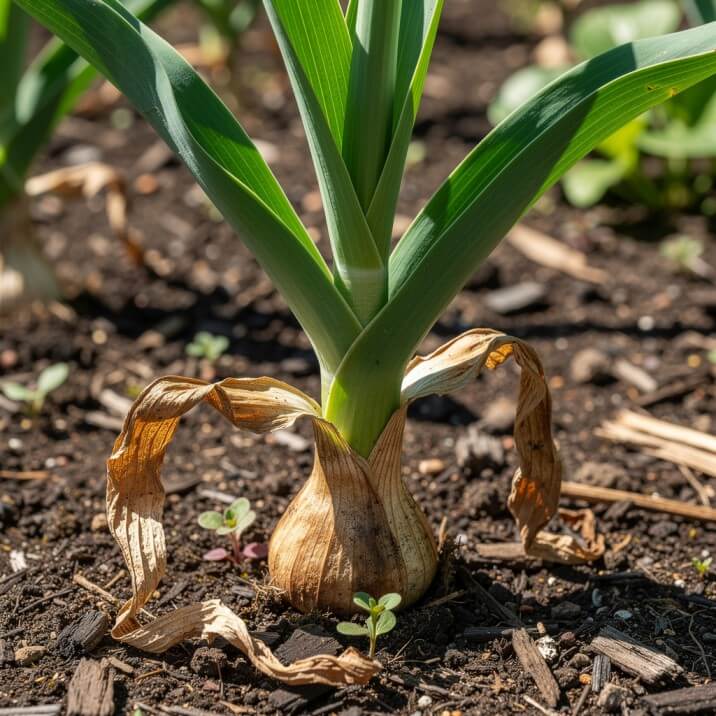
Garlic is ready to harvest when roughly half its leaves have turned brown, and the other half remain green.
Each leaf on the plant corresponds directly to one protective wrapper layer around the bulb. When a leaf dies, that wrapper dries.
When all the leaves die, all the wrappers are gone, and the bulb sits exposed underground with no protection — splitting, rotting, or separating into individual cloves.
The practical rule, confirmed by Cornell Cooperative Extension, is to look for at least 3 green leaves remaining on the plant before you dig (UMass Extension, 2024).
Those 3 living leaves mean 3 intact wrappers around the bulb — enough to protect it through curing and give it a proper storage life.
For hardneck garlic: dig when 30-50% of the leaves are yellow-brown, with 3-5 green leaves still visible from the top.
For softneck garlic: dig when 60-80% of the leaves are yellow-brown, with at least 5 green leaves remaining.
For Asiatic and Turban types: harvest as soon as the first signs of browning appear. These varieties have the thinnest wrappers and deteriorate fastest if left in the ground (Botanical Interests, 2024).
If you are unsure, dig up one test bulb before pulling the rest. Slice it crosswise. The cloves should be plump, distinct, and pressing firmly against their papery skin.
If there is visible space between the clove and the wrapper, the garlic needs another week or two.
Hardneck vs. Softneck: How Harvest Timing Differs by Variety
The type of garlic you planted changes both your harvest window and the signals you watch for. Most home gardeners grow one of these two types, and the differences matter.
Hardneck garlic produces a scape a curly flowering stalk that shoots up from the center of the plant in late spring or early summer.
The scape is your first timing signal. Remove it as soon as it completes one full curl. After scape removal, plan to harvest the bulbs in roughly 3-4 weeks (Azure Farm Life, 2023).
Hardneck varieties have fewer, larger cloves arranged in a single ring around a central woody stem. Common hardneck types include Rocambole, Porcelain, Purple Stripe, and Chesnok Red.
Softneck garlic produces no scape, so you rely entirely on leaf color. The neck of the plant stays flexible, which is why braiding is only possible with softneck varieties.
Softneck types typically have more cloves per bulb, arranged in multiple layers, with smaller inner cloves. Common types include Artichoke, Silverskin, and Italian Softneck.
| Feature | Hardneck | Softneck |
| Scape produced | Yes | No |
| Harvest cue | Scape curl + leaf browning | Leaf browning only |
| Typical harvest window | 3-4 weeks after scape removal | When 60-80% of leaves are brown |
| Cloves per bulb | 4-12, large | 10-20+, mixed sizes |
| Wrappers at harvest | Keep 3-5 green leaves | Keep 5+ green leaves |
| Storage (cured) | 3-6 months | 6-12 months |
| Can be braided | No — stiff neck | Yes — flexible neck |
When to Harvest Garlic by USDA Zone: A Practical Calendar
Harvest timing depends on your climate zone, not a fixed date. Most competitors say “June or July” without being more specific. Here is a zone-by-zone breakdown based on standard fall planting dates.
These windows assume fall planting in October or November, which is the most common schedule. If you planted in spring, subtract 2-4 weeks from these estimates.
| USDA Zone | Climate Type | Typical Harvest Window |
| Zones 3-4 | Very cold (Canada, northern Minnesota) | Late July to mid-August |
| Zones 5-6 | Cold-moderate (most of the Midwest, Northeast) | Mid-July to early August |
| Zones 7-8 | Mild (Pacific Northwest, Mid-Atlantic, parts of the South) | Late June to mid-July |
| Zones 9-10 | Warm (California, Texas Gulf Coast, Florida) | Late May to mid-June |
| Zones 10-11 | Hot year-round | May, or whenever vernalization cues are met |
To find your USDA zone, use the USDA Plant Hardiness Zone Map at planthardiness.ars.usda.gov.
Temperature and rainfall in any given year can push harvest 1-2 weeks earlier or later than these windows.
An unusually hot spring accelerates bulb maturation. Excessive spring rain can slow it, and also raises the risk of rot if you do not stop watering early enough.
The Cross-Cut Test: How to Check Bulb Readiness Without Pulling Everything
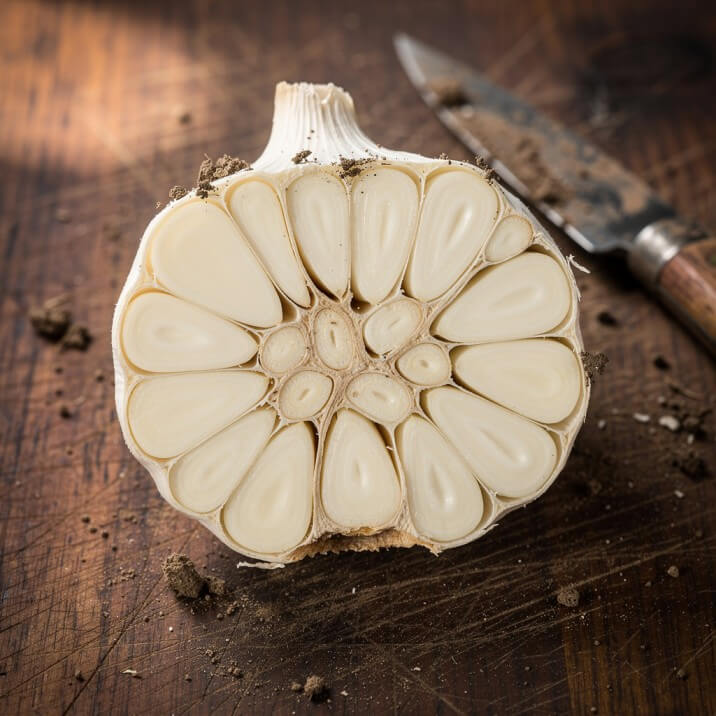
Most gardeners either guess at timing or rely only on leaf color. There is a better method that gives you a direct look at bulb development before you commit to the full harvest.
Pull one bulb just one a week or two before you expect the main harvest to be ready. Slice it in half crosswise (through the equator of the bulb, not from top to bottom). Look at the cross-section.
Ready: Cloves are plump and visibly pressing against the papery skin. The wrappers look intact and slightly papery.
Not ready: You can see gaps between the clove and the skin. The outer wrapper may look thin or not fully formed. Leave the rest in the ground for another 5-7 days, then test again.
Overripe: The outer skins show cracks or splits. Individual cloves may have started to separate from the bulb structure. Harvest immediately every day left in the ground now reduces storage life.
This test saves far more than it costs. Sacrificing one bulb to confirm timing beats harvesting 50 bulbs a week too early and losing most of the yield potential.
Stop Watering 2-3 Weeks Before Harvest – Here Is Why It Matters
Stop all irrigation 2-3 weeks before your planned harvest date. If rain falls during this window, you cannot control that but you can avoid adding more moisture on top of it.
The reason matters: the outer wrapper layers of the garlic bulb need to start drying while the bulb is still in the ground.
When you cut off water, those wrappers begin to tighten and form the papery skin that protects the bulb in storage.
Garlic that comes out of the ground with loose, moist wrappers requires a much longer curing period and is at higher risk for mold (Smart Garden Guru, 2026).
A garlic grower writing for Garlic Gods described running irrigation right up to harvest day. The bulbs came out soft and damp, and mold appeared within days of hanging them to cure.
The following year, with irrigation stopped two weeks early, the bulbs had tight papery skins right out of the ground and stored for several months longer (Garlic Gods, 2025).
Dry soil also makes harvesting physically easier. Less soil clinging to the roots means less cleaning, less scrubbing, and less risk of accidentally rubbing off outer wrapper layers during the cleaning step.
If heavy rain occurs in the 2 weeks before harvest, shake off as much soil as possible at the time of digging and give the bulbs extra airflow during curing.
Do not try to speed this up with a fan pointed directly at the bulbs indirect airflow works better.
Garlic Scapes: Harvest These First, Then Wait 3-4 Weeks
Garlic scapes grow on hardneck varieties only. They emerge from the center of the plant in late spring or early summer usually May or June depending on your zone and start as a straight green shoot before curling into a loop or corkscrew shape.
Harvest scapes as soon as they form a complete curl. To remove, cut or snap the scape off at the base where it emerges from the leaves.
Do not wait until the scape straightens back up — at that point it becomes woody and less useful for cooking, and the plant shifts energy toward forming a seed head instead of sizing up the bulb.
Removing the scape at the right time redirects the plant’s energy into the bulb (MIgardener, 2025). For most hardneck varieties, you can expect the main bulb harvest 3-4 weeks after scape removal.
Scapes are edible and have a mild garlic flavor with a hint of green onion. Common uses include garlic scape pesto (blend scapes with olive oil, Parmesan, and nuts), stir-fried with butter, grilled, or pickled. They store in the refrigerator for up to 3 weeks.
Step-by-Step: How to Dig Up Garlic Without Damaging Bulbs
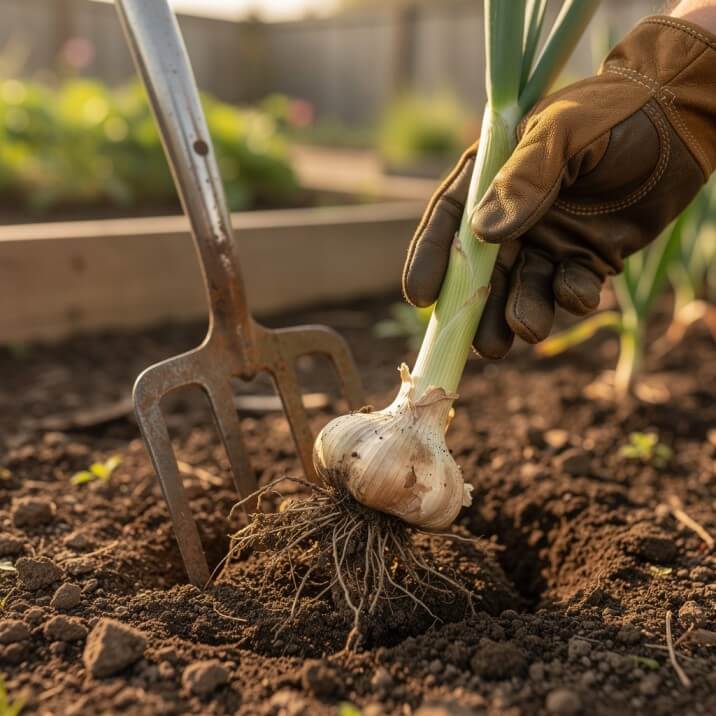
Garlic bulbs feel hard but bruise easily. A bruise creates an entry point for mold and rot during curing, and a bruised bulb will not store as long as an undamaged one. Handle every bulb as carefully as you would handle an egg.
What you need:
- Garden fork or flat-tined digging fork (first choice)
- Alternatively: a flat spade or sturdy trowel
- Soft brush or cloth for cleaning
Step 1: Choose a Dry Day
Harvest on a dry day when the soil is not waterlogged. Wet soil clings to bulbs, is harder to clean off without damage, and increases rot risk during curing (Botanical Interests, 2024).
Step 2: Insert Your Fork Well Away From the Plant
Place the tines of your garden fork 4-6 inches away from the base of the plant. Insert at an angle aimed under the bulb, not straight down. This creates leverage under the root ball without piercing the bulb itself.
Do not use a shovel inserted directly next to the stalk. One slip and you slice directly through the bulb — a common mistake that ruins bulbs intended for storage.
Step 3: Lever the Soil Up, Then Pull Gently From the Base
Push the fork handle down to lever the soil and bulb upward. Once the soil loosens, grasp the plant at the neck — the point where the stalk meets the top of the bulb — and pull with steady, even pressure. Do not yank or twist.
If the stalk snaps off, the bulb is now more difficult to handle and cannot be hung for curing. This is why loosening the soil first is essential, not optional.
Step 4: Shake Off Loose Soil Gently
Hold the plant by the stalk and give it a gentle shake to dislodge loose soil clumps. Do not bang the bulb against your boot, the fork handle, or the ground.
Step 5: Brush – Do Not Wash
Use a soft brush or your fingers to remove remaining soil. Never rinse garlic with water before curing.
Water trapped in the wrapper layers causes mold during the curing phase (Azure Farm Life, 2023). If the soil is stubborn, let the bulbs air-dry for an hour, then brush again.
Step 6: Set Aside, Do Not Stack
Lay harvested bulbs on a flat surface in a single layer, or hang them immediately in small groups. Stacking garlic after harvest causes bruising on the bulbs at the bottom.
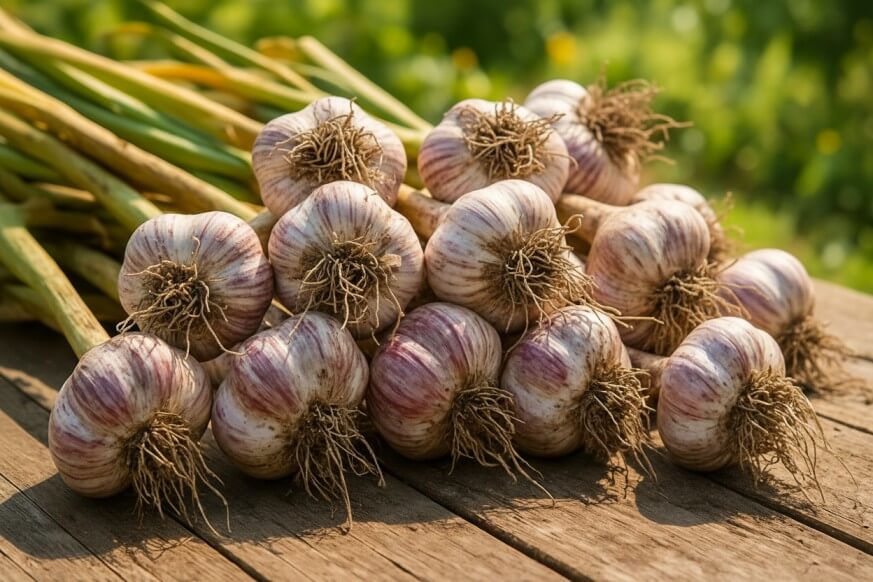
How to Cure Garlic: The 2-4 Week Drying Process
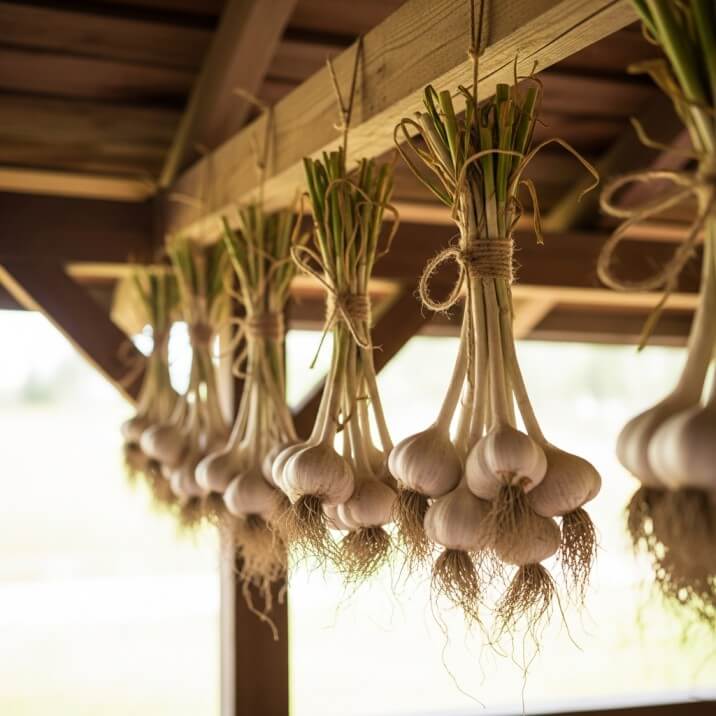
Curing is the drying period that transforms a freshly dug garlic bulb into something that can be stored for months.
During this time, the wrapper layers dry fully into papery skin, the neck seals, and the roots become brittle. The flavor also continues to develop and deepen during curing.
What you need:
- A shaded area with good airflow (covered porch, barn, shed, garage)
- Twine or string for bundles, OR mesh racks, screens, or wooden crates
- 2-4 weeks of patience
Do not cure in direct sun. Sunlight scorches the outer wrappers, weakens them, and can reduce flavor. Shade with airflow is the target environment.
Option 1: Hang in bundles
Tie 4-8 bulbs together by their stalks using twine. Hang the bundles with bulbs pointing down from a rafter, nail, or drying rack.
Smaller bundles dry faster because air can circulate around each bulb. Bundles of 10 or more slow down curing in humid climates and can develop mold at the center.
Option 2: Lay flat on a screen or rack
Spread bulbs in a single layer on a mesh screen, wire rack, or wooden crate with gaps. Flip them every few days so all surfaces dry evenly.
In humid climates or during wet summers, add a fan blowing gently across the curing space — not directly at the bulbs, but creating ambient airflow in the room.
Remove the fan once the outer skins feel completely dry, usually after 3 weeks (Keene Organics, 2024).
How to Tell When Curing Is Complete
Curing takes 2-4 weeks under typical conditions. It may take up to 6-8 weeks in humid regions (Garden Betty, 2025). Check these four signs before moving garlic to storage.
Sign 1: The outer wrappers are dry and papery. They should rustle and crackle when you handle the bulb — similar to the texture of store-bought garlic. Soft or slightly damp wrappers mean curing is not complete.
Sign 2: The neck is completely dry and tight. Pinch the neck (the stalk above the bulb). It should feel completely firm and papery, with no softness or moisture. A soft neck is the most reliable indicator that curing is incomplete.
Sign 3: The roots are brittle. Bend one of the roots. Fully cured roots snap rather than bend.
Sign 4: The stem is dry throughout. If trimming the stem now, the cut end should show no green or moist tissue inside — only dry material.
If any of these conditions are not met, leave the garlic in place for another 5-7 days before checking again.
How to Trim and Clean Cured Garlic
Once fully cured, garlic needs to be trimmed before moving to storage. This is also the point at which you sort bulbs into categories: long-term storage, use soon, and seed stock for next season.
Trimming stems: Cut the stalk to about 1 inch above the bulb for regular storage. If you plan to braid softneck varieties, do this before curing — while the stalks are still green and flexible.
Trimming roots: Cut roots to about 1/4 inch. Close trimming is fine, but avoid cutting into the root plate (the circular disk at the very base of the bulb). The root plate holds the cloves together; damage here can cause the bulb to fall apart during storage.
Cleaning wrappers: Rub off loose or heavily soiled outer layers. Do not remove wrapper layers that are firmly attached — each layer is a protective barrier. Remove only the outermost loose or damaged ones. The goal is clean wrappers, not bare cloves.
Grading: Sort into three groups.
- Large, unblemished bulbs with intact wrappers: long-term storage.
- Smaller bulbs or those with minor nicks: use in the kitchen first (within 4-6 weeks).
- The largest, healthiest bulbs with the most intact wrappers: set aside as seed stock for fall planting.
How to Store Cured Garlic: Temperature, Humidity, and Containers
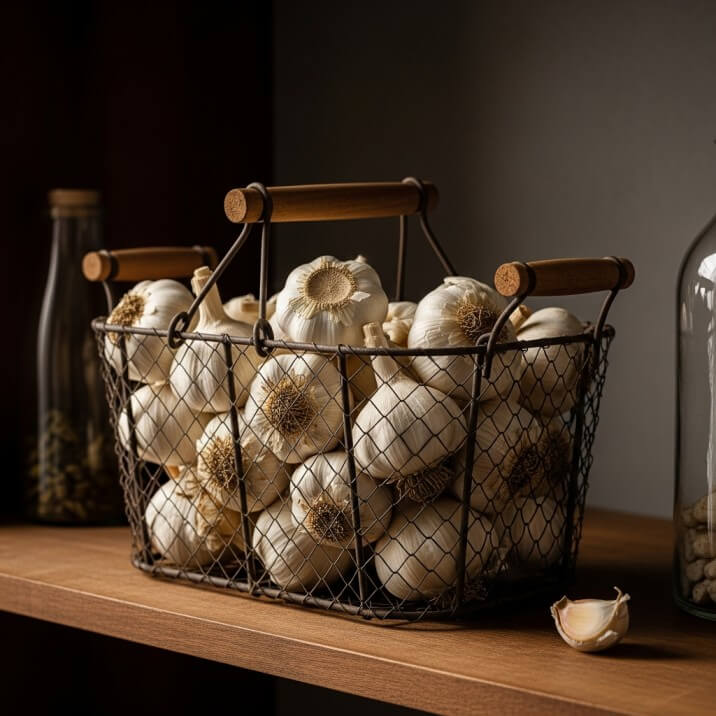
Store cured garlic in a location that is cool (55-65°F), dry (60-70% relative humidity), and dark. A pantry, basement, root cellar, or closet shelf all work. Avoid kitchens where temperatures fluctuate and humidity from cooking is common.
Container options that work: mesh bags, wicker baskets, wire baskets, paper bags, wooden crates with airflow gaps. The requirement is airflow. Garlic needs to breathe during storage.
Container options to avoid: sealed plastic containers, plastic bags, airtight jars. Trapped moisture causes mold within weeks.
Do not refrigerate whole, cured bulbs. Refrigerator temperatures and humidity accelerate sprouting. The exception: if you live in a climate where room temperature exceeds 70°F year-round and no cool space is available, store in a paper bag in the refrigerator crisper drawer and use within 2-3 months.
Do not store near ethylene-producing produce. Apples, pears, and bananas release ethylene gas, which triggers garlic to sprout faster. Keep garlic in a separate area of your pantry or storage space.
Commercial garlic operations store at approximately 32°F and 65% humidity for maximum longevity (A Way To Garden, 2025). Home storage at 55-65°F with good airflow is a practical and effective alternative.
How Long Does Cured Garlic Last? A Breakdown by Variety
Storage life varies by garlic group. Rocambole hardnecks are the shortest-storing and should be used first. Silverskin softnecks are the longest-storing and are worth saving for late in the season.
| Garlic Type | Variety Examples | Estimated Storage Life |
| Rocambole (hardneck) | Spanish Roja, Killarney Red | 3-4 months |
| Porcelain (hardneck) | Music, Georgian Crystal | 5-7 months |
| Purple Stripe (hardneck) | Chesnok Red, Persian Star | 5-7 months |
| Artichoke (softneck) | Inchelium Red, Lorz Italian | 6-9 months |
| Silverskin (softneck) | Nootka Rose, Silver Rose | 9-12 months |
These figures apply to fully cured bulbs stored under good conditions. Imperfect conditions — too warm, too humid, poor airflow — will shorten these windows significantly (Sustainable Market Farming, 2023).
If you grow both hardneck and softneck types, store them separately and work through the hardneck varieties first. Use or preserve any hardneck garlic that is nearing the end of its window before moving on to softneck stock.
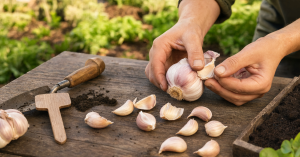
How to Save Seed Garlic from Your Harvest
You can replant cloves from your own harvest each fall instead of buying new seed garlic. The process is straightforward, but the cloves you select determine the quality of next year’s crop.
Select for size: The largest, heaviest bulbs from your harvest should become seed stock. Each clove you plant will produce a bulb similar in size to the one it came from. Planting large cloves consistently produces larger bulbs over time.
Select for health: The outer wrappers must be intact and free from mold, soft spots, nicks, and discoloration. Diseased seed garlic spreads that disease to your soil, where it can persist for years (High Mowing Seeds, 2024).
Do not use grocery store garlic as seed stock. Commercial garlic is often treated with sprout inhibitors, is selected for shelf appeal rather than growing performance, and may carry diseases not adapted to your region.
How much to save: Plan to replant roughly 10-15% of your harvest to maintain your bed size, or up to 25-30% if you want to expand planting.
Storage for seed stock: Keep seed garlic with your regular storage through summer. In the 2-3 weeks before your fall planting date, move the bulbs to a cool, dry location with temperatures between 50-60°F to keep them dormant until you are ready to plant.
Do not break the bulb into individual cloves until planting day. Exposing the individual cloves before planting increases the risk of disease and shortens their viability.
What to Do with Split, Bruised, or Damaged Bulbs
Not every bulb will come out of the ground in perfect condition. Here is how to triage the ones that are not.
Split bulbs: A bulb where the outer wrappers have cracked open and individual cloves are visible or partially separated is overripe. Do not attempt to store these. Use them in the kitchen within 1-2 weeks, or mince and freeze immediately (see preservation section below). The cloves are still fully usable — they just will not last.
Bruised bulbs: Any bulb that received a nick from a fork tine, fell and hit a hard surface, or was squeezed too firmly has a compromised wrapper. Move these to the “use first” pile regardless of how good the cloves look inside. The bruise creates an entry point for mold during curing.
Bulbs with rotten outer layers: Peel back the damaged outer wrappers carefully. If the inner cloves are firm and smell clean, the garlic is usable. If the rot has reached the inner cloves — soft texture, discoloration, off smell — discard entirely.
Bulbs with moldy wrappers from curing: Surface mold on the outer papery skin during curing is often manageable. Peel back the affected layers. If the cloves underneath are firm and unaffected, cure continues. If mold appears between the cloves or on the clove surfaces themselves, discard the bulb.
A useful rule from experienced growers: use damaged and bruised bulbs immediately, cure and store only the clean ones. Do not waste freezer space or kitchen time trying to rehabilitate garlic that will not last (Azure Farm Life, 2023).
Preserving Garlic Beyond Fresh Storage: 4 Reliable Methods
If you have a large harvest, more garlic than you can use fresh before it softens, or a short-storing hardneck variety, these preservation methods extend your supply well past the natural storage window.
Freezing
Peel and mince or crush garlic cloves. Spread in a thin layer on a parchment-lined baking sheet and freeze until solid (about 2 hours).
Transfer frozen portions to an airtight freezer bag or container. Frozen minced garlic lasts 10-12 months and goes directly into cooking from frozen.
Alternatively, freeze whole peeled cloves and mince as needed. The texture softens after freezing, so frozen garlic works best in cooked dishes rather than raw applications like aioli or fresh salsa.
Garlic Powder
Peel cloves and slice them thinly. Dry in a food dehydrator at 125°F (52°C) for 6-8 hours, or in an oven at the lowest possible setting (150°F or below) for 2-3 hours with the door slightly ajar. Once fully dry and brittle, grind in a spice grinder or blender.
Store in an airtight jar away from heat and light. Homemade garlic powder keeps for 12-18 months.
Roasted Garlic (Frozen)
Cut the top off a whole head to expose the cloves. Drizzle with olive oil, wrap in foil, and roast at 400°F (200°C) for 40-45 minutes until golden and soft.
Squeeze the roasted cloves out, mash, and freeze in tablespoon-sized portions using an ice cube tray. Transfer frozen portions to a sealed bag. Roasted garlic portions store for 6 months in the freezer.
Pickled Garlic
Peel cloves and pack into sterilized glass jars. Pour a hot brine made from equal parts white vinegar and water, plus 1 teaspoon of salt per cup of liquid, over the cloves.
Seal and refrigerate. Pickled garlic is ready in 1-2 weeks and keeps refrigerated for 3-4 months. It stays crisp, develops a milder flavor than raw garlic, and works well on cheese boards, in salads, and as a condiment.
Safety note on garlic in oil: Do not make homemade garlic-in-oil at room temperature and store it in the refrigerator for extended periods.
Garlic submerged in oil creates an anaerobic environment where Clostridium botulinum can produce toxins.
Commercial garlic-in-oil products are acidified and processed to safe standards; homemade versions are not.
If you want garlic oil for cooking, make only what you will use within 1-2 days and refrigerate immediately.
5 Harvesting Mistakes That Shorten Storage Life
These are the most common errors made at harvest time — each one reduces how long your garlic will last in storage.
Mistake 1: Harvesting too early. The bulb doubles in size in the final 3-4 weeks of growth (Keene Organics, 2024). Pulling bulbs before this window closes means smaller cloves, thinner wrappers, and shorter storage life. Always test with the cross-cut method before a full harvest.
Mistake 2: Pulling by the stalk instead of digging. Yanking the stalk snaps it at the neck, leaving you with no way to hang the bulb during curing. It also strains the neck tissue, opening a path for fungal infection. Always loosen the soil with a fork first.
Mistake 3: Washing bulbs before curing. Water trapped in the wrapper layers creates mold during curing. Brush off soil — never rinse.
Mistake 4: Curing in direct sun. Sunlight bakes the outer wrappers, weakening them and reducing flavor. A shaded, well-ventilated spot is correct.
Mistake 5: Storing in plastic bags or sealed containers. No airflow means trapped moisture. Garlic held in a sealed plastic bag will begin molding within 2-3 weeks, regardless of how well it was cured.
Garlic Harvest Problems: Common Causes and Fixes
| Problem | Likely Cause | Fix |
| Bulbs came out very small | Harvested too early; bulb sizing not complete | Let remaining plants grow another week; test with cross-cut method next time |
| Wrappers split open underground | Left in ground too long | Harvest immediately; use split bulbs first; aim for harvest when 40-50% of hardneck leaves are brown |
| Mold appearing during curing | Too much moisture; poor airflow; bulbs washed before curing | Improve ventilation; add indirect fan airflow; never wash pre-cure |
| Stalks snapping off at harvest | Soil not loosened first; force-pulling | Always use a fork to loosen before pulling |
| Garlic sprouting in storage | Too warm; too humid; stored near ethylene producers | Move to cooler location; store in mesh or paper, not plastic; separate from apples and bananas |
| Soft, spongy cloves in storage | Incomplete curing; too much humidity | Test for full cure before storing; check that neck is completely dry before moving to storage |
| Fusarium rot during curing | Warm, humid storage; harvest during wet conditions | Cure at 60-65°F with airflow; commercial research found that 50-80% humidity in warm storage (above 50°F) produced high Fusarium rates (UMass Extension, 2024) |
Frequently Asked Questions About Harvesting Garlic
When is garlic ready to harvest?
Garlic is ready when 30-50% of the leaves on hardneck varieties have turned yellow-brown, with 3-5 green leaves still remaining. For softneck varieties, wait until 60-80% of the leaves have turned. The cross-cut test — digging up one bulb and slicing it crosswise — confirms readiness before you commit to the full harvest.
How do I know if I harvested my garlic too early?
Bulbs harvested too early look and feel like green onion bulbs rather than divided garlic heads. The wrappers will be thin and fall apart when handled. If you are not yet at harvest time and notice the leaves are still mostly green, leave the plants in the ground and check again in a week.
Can I harvest garlic when the ground is wet?
Avoid harvesting in wet conditions if possible. Wet soil clings to bulbs, is harder to remove without damaging the outer wrappers, and increases mold risk during curing. If you cannot wait for dry conditions, shake off as much soil as possible at harvest and ensure extra airflow during curing.
What is the difference between curing and storing garlic?
Curing is the active drying phase immediately after harvest, lasting 2-4 weeks in a shaded, ventilated space. Storage is the long-term phase that follows curing, lasting months in a cool, dark, dry location. Skipping or shortening the curing phase dramatically reduces how long garlic lasts in storage.
Do I need to remove garlic scapes before harvest?
Yes — for hardneck varieties. Removing the scape when it completes its first curl redirects the plant’s energy from forming a seed head into sizing up the bulb. Scapes left on the plant can reduce bulb size by a meaningful amount. Softneck varieties do not produce scapes.
Can I replant garlic from my own harvest?
Yes. Select the largest, most blemished-free bulbs from your harvest, set them aside during curing, and store them in the same conditions as eating garlic until fall planting time. Do not break bulbs into cloves until planting day. Avoid replanting from grocery store garlic, which is often treated to suppress sprouting.
How do I store garlic if I do not have a root cellar?
A pantry, closet shelf, or dark cabinet at room temperature (55-65°F) works well. Use a mesh bag, wicker basket, or paper bag — anything that allows airflow. Avoid plastic, sealed containers, or the refrigerator for whole cured bulbs. In very warm climates, the refrigerator crisper in a paper bag is a workable alternative.
Why is my cured garlic sprouting in storage?
Garlic sprouts when temperatures are too warm, humidity is too high, or the bulbs are stored near ethylene-producing produce like apples or bananas. Move the garlic to a cooler spot with better airflow. Sprouted garlic is still edible — the sprout is mildly bitter, so remove it before cooking if flavor is a concern.
Key Takeaways
- Harvest hardneck garlic when 30-50% of leaves are brown, and softneck when 60-80% are brown — with at least 3 green leaves remaining.
- Use the cross-cut test on one bulb to confirm readiness before the full harvest.
- Stop watering 2-3 weeks before harvest to tighten wrapper skins and reduce mold risk during curing.
- Always loosen soil with a fork before pulling — never yank by the stalk.
- Cure in a shaded, well-ventilated space for 2-4 weeks; look for dry papery wrappers, a firm neck, and brittle roots before declaring the cure complete.
- Store in breathable containers (mesh, paper, wicker) at 55-65°F; hardneck lasts 3-6 months, softneck 6-12 months.
- Freeze, dehydrate, roast, or pickle surplus garlic before the fresh storage window closes.
- Save your largest, healthiest bulbs as seed garlic for fall replanting.