Homemade fertilizer for herbs can be made using kitchen scraps and natural ingredients. Compost, eggshells, and coffee grounds work well.
Growing herb plants at home offers fresh flavors and health benefits. For thriving herbs, homemade fertilizers provide essential nutrients. Natural fertilizers are eco-friendly and cost-effective. Compost, rich in organic matter, improves soil structure. Crushed eggshells supply calcium, promoting strong cell walls.
Coffee grounds add nitrogen, which is crucial for leafy growth. By recycling kitchen scraps, gardeners reduce waste and nourish their indoor plants. Homemade fertilizers ensure herbs grow healthy and flavorful. These natural fertilizers also avoid chemicals, keeping your garden organic. Proper plant food can result in a bountiful and sustainable harvest.
The benefits of Homemade Fertilizer for Herbs
Understanding the advantages of homemade fertilizers can significantly enhance your herb gardening experience.
Growing herbs at home is a rewarding experience. Using homemade fertilizer can boost the growth of your herbs. Homemade fertilizer is not only cost-effective and environmentally friendly, but it also empowers you to control what goes into your soil. This ensures your herbs are healthy and chemical-free, giving you a sense of control over your gardening journey.
Cost-effective Solutions
Homemade fertilizers are a great way to save money. By using kitchen scraps and yard waste to create rich compost, you can significantly reduce the need to buy expensive store-bought fertilizers. This resourcefulness not only saves you money but also contributes to a more sustainable gardening practice.
- Compost: Composting is a great way to recycle organic waste. It enriches the soil and provides nutrients to your herbs.
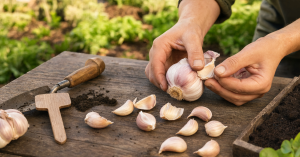
- Eggshells: Crushed eggshells add calcium to the soil. This helps prevent issues like blossom end rot.
- Banana Peels: Banana peels are rich in potassium. They help your herbs grow strong and healthy.
Below is a table showing the cost comparison between homemade and store-bought fertilizers:
| Fertilizer Type | Cost |
| Homemade Compost | $0 |
| Store-bought Fertilizer | $10-$30 |
Environmental Impact
Using homemade liquid fertilizer is beneficial not only for your plants but also for the environment. By reducing waste and the need for chemical fertilizers, you are actively contributing to a healthier ecosystem. This responsible gardening practice helps keep harmful chemicals out of the soil and water, promoting a more sustainable environment for your herbs to thrive.
- Reduces Landfill Waste: Using kitchen scraps for compost keeps them out of landfills.
- Decreases Pollution: Homemade fertilizers reduce the need for chemical fertilizers that can pollute water sources.
- Promotes Biodiversity: Natural fertilizers encourage a healthy ecosystem in your garden.
Making your fertilizer is a small step towards a greener planet. It supports sustainable herb gardening practices and promotes healthy plant growth.
How Often You Should Fertilize Herbs
Fertilizing herbs properly ensures they grow well and stay healthy. Over-fertilizing can harm plants while under-fertilizing can stunt their growth. Here are some guidelines on how often to fertilize your herbs:
- Every 4-6 Weeks: For most herbs, fertilize once every 4-6 weeks during the growing season.
- Monthly: Some fast-growing herbs, like basil, may need monthly feeding.
- Seasonal: Perennial herbs may only need fertilizing at the beginning of the growing season.
Observation and Adjustment: it’s crucial to observe your plants and adjust the frequency of fertilization as needed. Healthy herbs will show vibrant growth and rich green color. Always dilute liquid fertilizers to avoid burning the plants. Using homemade fertilizers helps you provide a balanced diet for your herbs, ensuring they thrive in your garden.
Credit: gardening.org
Key Ingredients to Use
Creating homemade herb fertilizers is an excellent way to ensure they get nutrients. Using natural and sustainable ingredients can result in a healthier and more productive herb garden. Below are some key ingredients you can use to make effective homemade fertilizers.
Kitchen Scraps
Kitchen scraps are a fantastic source of nutrients for your herbs. They are not only easy to gather but also help reduce waste. Here are some common kitchen scraps that can be used as fertilizer:
- Eggshells: Crushed eggshells add calcium to the soil, helping strengthen plant cell walls.
- Coffee Grounds: These are rich in nitrogen, which is essential for leafy growth. They also help improve soil structure.
- Banana Peels: High in potassium, banana peels promote strong root growth and improve overall plant health.
- Vegetable Peelings: These add a variety of nutrients back into the soil, enhancing its fertility.
Using kitchen scraps as fertilizer is simple. Collect these items in a compost bin or directly bury them in the soil near your herbs. Over time, they break down and release nutrients into the soil.
| Kitchen Scrap | Main Nutrient | Benefit |
| Eggshells | Calcium | Strengthens cell walls |
| Coffee Grounds | Nitrogen | Promotes leafy growth |
| Banana Peels | Potassium | Improves root health |
| Vegetable Peelings | Various | Enhances soil fertility |
Natural Additives
Natural additives are another excellent way to boost the nutrient content of your homemade fertilizer. These additives are usually readily available and can significantly improve the health of your herb garden:
- Compost: Rich in various nutrients, compost is an all-purpose fertilizer that enhances soil structure and fertility.
- Manure: Well-rotted manure adds nutrients like nitrogen, phosphorus, and potassium. It also improves soil texture.
- Wood Ash: A good potassium and calcium carbonate source, wood ash helps balance soil pH and promotes strong plant growth.
- Seaweed: This provides trace minerals and growth hormones, which benefit overall plant health.
Mix these natural additives into the soil or create a liquid fertilizer by steeping them in water. Here’s a simple table to summarize their benefits:
| Natural Additive | Main Nutrient | Benefit |
| Compost | Various | Enhances soil structure and fertility |
| Manure | Nitrogen, Phosphorus, Potassium | Improves soil texture |
| Wood Ash | Potassium, Calcium Carbonate | Balances soil pH |
| Seaweed | Trace Minerals | Promotes overall plant health |
Utilizing natural additives ensures that your herbs receive a balanced diet of nutrients. This leads to vibrant, healthy plants that can thrive in your garden.
Composting Basics
Creating homemade fertilizer for your herbs can be a rewarding and eco-friendly way to enhance your garden. Composting Basics is a fundamental aspect of making your fertilizer. By understanding the essentials of composting, you can give your herbs the nutrients they need to thrive. This section covers the basics, including how to recognize when your herbs need fertilizer, build a compost pile, and maintain it properly.
How Do You Know When Herbs Need Fertilizer?
Recognizing when your herbs need fertilizer is crucial for maintaining a healthy garden. Look for these signs to determine if your herbs require additional nutrients:
- Yellowing Leaves: If the leaves turn yellow, it could indicate a nutrient deficiency.
- Stunted Growth: Herbs that aren’t growing as expected may need extra fertilizer.
- Poor Leaf Production: Sparse or small leaves suggest your herbs need more nutrients.
Evaluating soil quality can also help you decide if fertilizer is needed. Use a soil test kit to check for nutrient levels and pH balance. Optimal soil conditions for herbs include:
| pH Level | Nutrient Levels |
| 6.0 – 7.0 | High in nitrogen, phosphorus, and potassium |
Regular observation of your herbs ensures they receive the proper care. Healthy herbs exhibit vibrant green leaves, strong stems, and a robust aroma.
Building A Compost Pile
Building a compost pile is the first step towards creating homemade fertilizer. Follow these steps to build an effective compost pile:
- Choose a Location: Select a spot with good drainage and partial shade.
- Gather Materials: Collect green and brown materials. Green materials include grass clippings, kitchen scraps, and coffee grounds. Brown materials include leaves, straws, and cardboard.
- Layer the Materials: Start with a layer of brown materials, then add green materials—alternate layers to create a balanced compost.
- Moisture and Aeration: Keep the pile moist but not soggy. Turn the pile regularly to ensure proper aeration.
Ideal composting ratios involve mixing materials in the right proportions. Aim for a ratio of 3:1 brown to green materials for optimal decomposition.
Maintaining Your Compost
Maintaining your compost pile is essential to produce high-quality fertilizer. Here are some tips to keep your compost healthy:
- Turn the Pile: Turn the compost pile every 1-2 weeks to aerate it and speed up decomposition.
- Monitor Moisture Levels: Ensure the compost remains damp. Add water if it’s too dry or brown materials if it’s too wet.
- Check Temperature: The compost should be warm. If it’s not, add more green materials to increase nitrogen levels.
Compost maturity is critical for effective fertilization. Fully matured compost is dark, crumbly, and has an earthy smell. Use a compost thermometer or the hand-squeeze test to check if the compost is ready:
| Test | Criteria |
| Hand-Squeeze Test | Compost should hold together when squeezed but not drip water. |
| Thermometer Test | Compost should be between 140°F and 160°F during the active phase and cool to ambient temperature when finished. |
Following these guidelines, you can ensure your compost pile remains healthy and productive, providing your herbs with the nutrients they need to grow strong and flavorful.
Types Of Homemade Fertilizers For Herbs
Growing healthy herbs at home is a rewarding experience. Using homemade fertilizers can boost the growth and flavor of your herbs. You can use different types of homemade fertilizers, each with its own benefits. Understanding these types will help you choose the best options for your herb garden.
Liquid Fertilizers
Liquid fertilizers are easy to apply and quickly absorbed by plants. They are perfect for herbs as they provide immediate nutrients. Here are some effective homemade liquid fertilizers:
- Compost Tea: Steep compost in water for a nutrient-rich solution. Use a 5:1 water-to-compost ratio. Let it sit for 24 hours, then strain and use.
- Fish Emulsion: Mix fish scraps in water. Let it decompose for a few weeks. This provides nitrogen and other essential nutrients.
- Banana Peel Tea: Soak banana peels in water for 2-3 days. The water absorbs potassium and phosphorus, which are great for herbs.
A simple table can help you remember the ingredients and benefits:
| Fertilizer | Ingredients | Benefits |
| Compost Tea | Compost, Water | Rich in nutrients |
| Fish Emulsion | Fish Scraps, Water | High in nitrogen |
| Banana Peel Tea | Banana Peels, Water | High in potassium |
Liquid fertilizers are ideal for a quick nutrient boost. Use them every 2-4 weeks for the best results.
Dry Fertilizers
Dry fertilizers release nutrients slowly. They are great for long-term feeding of your herbs. Here are some popular homemade dry fertilizers:
- Eggshell Powder: Crush eggshells into a fine powder. This provides calcium, which strengthens plant cell walls.
- Coffee Grounds: Spread used coffee grounds around your herbs. They add nitrogen and improve soil structure.
- Wood Ash: Sprinkle wood ash on the soil. It adds potassium and raises the soil pH.
A summary table for quick reference:
| Fertilizer | Ingredients | Benefits |
| Eggshell Powder | Crushed Eggshells | High in calcium |
| Coffee Grounds | Used Coffee Grounds | Rich in nitrogen |
| Wood Ash | Wood Ash | High in potassium |
Dry fertilizers are easy to store and apply. Use them every few months to keep your herbs thriving.
Making Liquid Fertilizer
Growing herbs at home can be a rewarding experience. Providing the right nutrients is essential to ensure your herbs thrive. One of the best ways to do this is by making liquid fertilizer.
Homemade liquid fertilizers are not only cost-effective but also environmentally friendly. They are easy to make and can be tailored to meet the specific needs of your herbs.
Comfrey Tea
Comfrey tea is a powerful liquid fertilizer that provides essential nutrients for your herbs. Comfrey leaves are rich in potassium, which helps with flowering and fruiting.
Here’s how to make Comfrey Tea:
- Gather a bunch of comfrey leaves.
- Cut the leaves into smaller pieces.
- Place the leaves in a bucket and fill it with water.
- Cover the bucket and let it sit for 3-4 weeks.
- Stir the mixture occasionally.
- Once ready, strain the liquid into another container.
- Use a ratio of 1:10 (1 part comfrey tea to 10 parts water) to fertilize your herbs.
- High in potassium, phosphorus, and nitrogen.
- Promotes strong root growth.
- Enhances flowering and fruiting.
- Apply the tea once a week for best results.
- Use it as a foliar spray or soil drench.
- Store the tea in a cool, dark place.
Banana Peel Solution
The banana peel solution is another excellent homemade fertilizer. Banana peels are rich in potassium and phosphorus, which are crucial for plant health.
Here’s how to make Banana Peel Solution:
- Collect banana peels from ripe bananas.
- Cut the peels into small pieces.
- Place the pieces in a jar and cover with water.
- Let the mixture sit for 2-3 days.
- Strain the liquid into another container.
- Use a ratio of 1:5 (1 part banana peel solution to 5 parts water) to fertilize your herbs.
- Rich in potassium and phosphorus.
- Improves root development.
- Boosts overall plant health.
- Apply the solution every two weeks.
- Use it as a soil drench for best results.
- Store the solution in a cool, dark place.
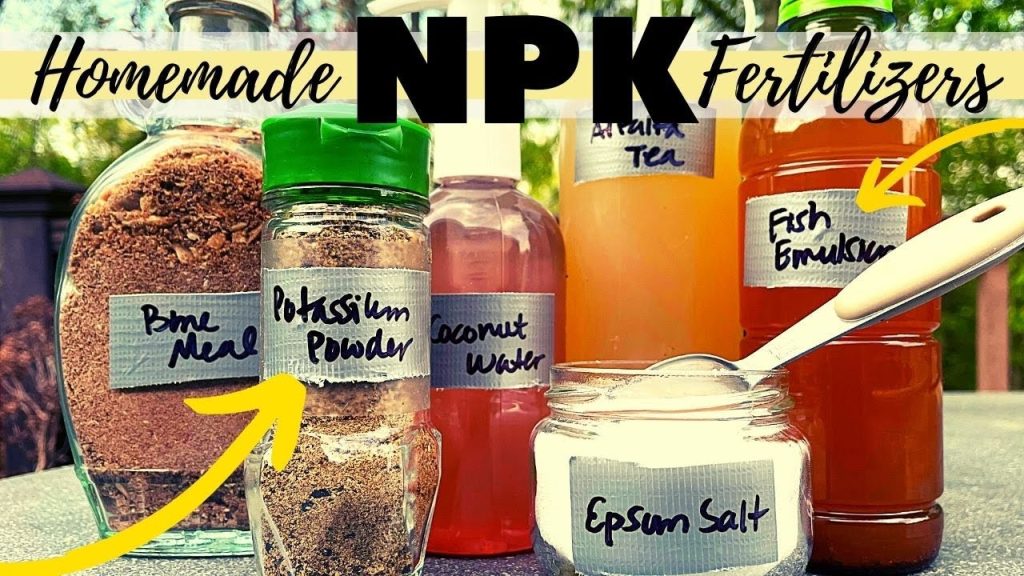
Credit: m.youtube.com
Creating Dry Fertilizer
Creating homemade fertilizer for your herbs can be both fun and rewarding. Dry fertilizers are especially easy to make and use. They provide essential nutrients that help your herbs thrive. You can mix these fertilizers directly into the soil or sprinkle them around the base of the plants. This blog will cover two effective dry fertilizer mixes: Bone Meal Mix and Wood Ash Blend.
Bone Meal Mix
Bone meal is a fantastic source of phosphorus and calcium. These nutrients are vital for root development and overall plant health. Making a bone meal mix is simple and only requires a few ingredients. Below are the steps and ingredients for an effective bone meal mix:
- Ingredients:
- Bone meal powder – 1 cup
- Compost – 2 cups
- Wood ash – 1 cup
- Instructions:
- Mix all the ingredients thoroughly in a large container.
- Sprinkle the mix around the base of your herbs.
- Gently work it into the top inch of the soil.
This mix is rich in nutrients and helps your herbs grow strong. Phosphorus from the bone meal promotes root growth, while calcium strengthens the plant cells. The compost adds organic matter, and the wood ash provides potassium.
For best results, apply this mix once every 4-6 weeks. Ensure your plants are well-watered after application. Below is a quick reference table for the bone meal mix:
| Ingredient | Quantity |
| Bone meal powder | 1 cup |
| Compost | 2 cups |
| Wood ash | 1 cup |
Wood Ash Blend
Wood ash is another excellent ingredient for homemade dry fertilizers. It is high in potassium crucial for flower and fruit development. Below are the steps and ingredients for a wood ash blend:
- Ingredients:
- Wood ash – 2 cups
- Bone meal – 1 cup
- Compost – 2 cups
- Instructions:
- Combine all the ingredients in a large mixing bowl.
- Stir until they are well blended.
- Sprinkle the mix around the base of your herbs.
- Lightly till the soil to mix the fertilizer in.
This blend ensures your herbs get a balanced diet of nutrients. The potassium from the wood ash boosts flower and fruit production. Bone meal provides phosphorus and calcium for strong roots and healthy growth. Compost adds organic matter, improving soil structure and fertility.
Use this blend every 4-6 weeks for optimal results. Always water your herbs well after applying the fertilizer. Below is a quick reference table for the wood ash blend:
| Ingredient | Quantity |
| Wood ash | 2 cups |
| Bone meal | 1 cup |
| Compost | 2 cups |
How To Use Homemade Fertilizer For Herbs
Using homemade fertilizer for herbs can boost their growth and flavor. Understanding how to use these fertilizers effectively is key. Here, we’ll explore the best timing and methods for application to ensure your herbs thrive.
Timing And Frequency
Knowing the right timing and frequency is crucial for applying homemade fertilizer. Different herbs have unique needs, but some general rules can help guide you.
Most herbs benefit from fertilization during their growing season. This period typically spans from early spring to late summer. Spring is the best time to start because the plants emerge from dormancy and need nutrients to grow.
Here is a quick guide for timing:
- Annual herbs (like basil and cilantro): Fertilize every 3-4 weeks.
- Perennial herbs (like rosemary and Thyme): Fertilize every 4-6 weeks.
- Container herbs: Fertilize every 2-3 weeks due to limited soil nutrients.
Over-fertilizing can harm herbs. Use small amounts of fertilizer more frequently rather than large amounts less often. This ensures a steady supply of nutrients without overwhelming the plants.
Methods Of Application
There are various methods to apply homemade fertilizer to herbs. Each method has benefits; you can choose based on your garden’s needs.
Here are some effective methods:
- Soil Drench: Mix the fertilizer with water and pour it directly onto the soil around the herbs. This ensures nutrients reach the roots quickly.
- Foliar Spray: Dilute the fertilizer in water and spray it onto the leaves. This is good for quick nutrient absorption, especially during a growth spurt.
- Compost Tea: Soak compost in water to create a nutrient-rich tea. Use this to water your herbs, giving them a broad range of nutrients.
Below is a simple recipe for a homemade fertilizer:
| Ingredient | Quantity |
| Banana Peels | 2 |
| Eggshells | 5 |
| Used Coffee Grounds | 1 cup |
| Water | 1 gallon |
Blend the ingredients and let them sit for a day before using. This mixture is rich in potassium, calcium, and nitrogen, perfect for healthy herb growth.
Herbs That Benefit Most
Using homemade fertilizer for herbs can significantly boost their growth and flavor. Certain herbs benefit more from homemade fertilizers due to their specific nutrient needs. Here, we will explore which herbs benefit most from homemade fertilizer and how to optimize their growth.
Basil And Thyme
Basil and Thyme thrive with homemade nitrogen, phosphorus, and potassium fertilizers. These nutrients are essential for their growth and aromatic qualities.
Basil loves a nitrogen-rich environment. Homemade fertilizers like compost tea or fish emulsion provide the necessary nitrogen. Basil also benefits from well-drained soil and regular watering.
- Compost tea: Steep compost in water for 24-48 hours.
- Fish emulsion: Dilute fish emulsion in water as per instructions.
Thyme requires a balanced mix of nutrients. A good homemade fertilizer for Thyme can be a mix of compost and bone meal. This combination provides essential phosphorus for root development and potassium for disease resistance.
| Herb | Fertilizer | Frequency |
| Basil | Compost Tea | Every 2 weeks |
| Thyme | Bone Meal | Monthly |
Mint And Oregano
Mint benefits greatly from homemade fertilizers that are high in nitrogen. Coffee grounds and fish emulsion are excellent choices for Mint. These fertilizers encourage lush, green growth and enhance the minty aroma.
- Coffee grounds: Sprinkle used coffee grounds around the base of the plant.
- Fish emulsion: Mix with water and apply every 2 weeks.
Oregano prefers a slightly different approach. A mix of compost and aged manure works wonders for Oregano. This combination provides a balanced nutrient supply, promoting healthy foliage and robust flavor.
| Herb | Fertilizer | Frequency |
| Mint | Coffee Grounds | Every 2 weeks |
| Oregano | Aged Manure | Monthly |
Signs Of Nutrient Deficiency
Growing herbs at home can be a delightful and rewarding experience. But your herbs need the right nutrients to thrive. Recognizing the signs of nutrient deficiency is crucial. Identifying and addressing these signs early can save plants and ensure a bountiful harvest.
Yellowing Leaves
One common sign of nutrient deficiency in herbs is yellowing leaves. A lack of essential nutrients like nitrogen, magnesium, or iron can cause this. Here are some specific symptoms to watch for:
- Nitrogen deficiency: Leaves turn yellow from the bottom up, while new growth stays green.
- Magnesium deficiency: Yellowing occurs between the veins of older leaves while the veins remain green.
- Iron deficiency: Newer leaves turn yellow, but veins remain green.
You can use homemade fertilizers rich in these nutrients to address yellowing leaves. Here’s a simple recipe:
| Ingredient | Purpose |
| Composted Manure | Provides nitrogen |
| Epsom Salt | Supplies magnesium |
| Iron Chelate | Offers iron |
Mix these ingredients into your soil to help your herbs recover. Monitor your plants regularly to ensure they are responding well to the treatment.
Stunted Growth
Stunted growth is another clear sign of nutrient deficiency. Herbs that lack essential nutrients often grow slowly or not at all. Here are some key points to consider:
- Phosphorus deficiency: Plants may have dark green or purplish leaves and show little new growth.
- Potassium deficiency: Older leaves may have brown edges, and the plant may appear weak.
- Calcium deficiency: New leaves may be distorted or have irregular shapes.
To combat stunted growth, try this homemade fertilizer blend:
| Ingredient | Purpose |
| Bone Meal | Provides phosphorus |
| Banana Peels | Supply potassium |
| Crushed Eggshells | Offer calcium |
Add these ingredients to your soil to boost nutrient levels and encourage growth. Always observe your herbs closely to ensure they are recovering and thriving.
Storing Homemade Fertilizer f
or Herbs
Creating homemade fertilizer for your herbs is a rewarding and eco-friendly way to nourish your plants. Proper storage of this homemade fertilizer ensures its effectiveness and longevity. By storing it correctly, you can maintain the nutrients and avoid spoilage, ensuring your herbs thrive year-round.
Container Options
Choosing the right container for storing homemade fertilizer is crucial. The best containers keep the fertilizer fresh and prevent contamination. Here are some excellent options:
- Glass Jars: Airtight glass jars are perfect for storing dry fertilizers. They prevent moisture from getting in and keep the nutrients intact.
- Plastic Containers: Use high-quality, food-grade plastic containers with tight seals. They are lightweight and durable.
- Metal Tins: Metal tins with tight-fitting lids are great for dry fertilizer. They protect the contents from light and air.
- Plastic Bags: Heavy-duty, resealable plastic bags work well for liquid and dry fertilizers. Ensure they are stored in a cool, dark place.
Here’s a quick comparison table for easy reference:
| Container Type | Best For | Pros | Cons |
| Glass Jars | Dry Fertilizer | Airtight, durable | Heavy, breakable |
| Plastic Containers | Both | Lightweight, durable | Can degrade over time |
| Metal Tins | Dry Fertilizer | Lightproof, airtight | Can rust if not properly sealed |
| Plastic Bags | Both | Flexible, space-saving | Less durable, need proper sealing |
Shelf Life Tips
To make the most of your homemade fertilizer, follow these shelf-life tips:
- Keep It Dry: For dry fertilizers, ensure they are stored in a moisture-free environment. Moisture can cause clumping and reduce effectiveness.
- Cool and Dark: Store liquid and dry fertilizers in a cool, dark place. Heat and light can degrade the nutrients.
- Label Clearly: Always label your containers with the date of preparation. This helps you track the freshness of your fertilizer.
- Use Preservatives: For liquid fertilizers, consider adding natural preservatives like vinegar or alcohol to extend shelf life.
Here’s a quick guide to the shelf life of different types of homemade fertilizers:
| Fertilizer Type | Storage Conditions | Shelf Life |
| Dry Fertilizer | Cool, dry place | Up to 1 year |
| Liquid Fertilizer | Refrigerated | 6 months to 1 year |
Following these tips ensures that your homemade fertilizer remains effective and beneficial for your herbs. Proper storage means healthier, more vibrant plants.
Troubleshooting Common Issues
Using homemade herb fertilizer is a cost-effective and eco-friendly way to nourish your plants. But even with the best intentions, problems can arise. Understanding these issues is key to maintaining healthy, vibrant herbs. Let’s explore some common problems and how to fix them.
Over-fertilization
Over-fertilization is a common issue with homemade fertilizers. Too much fertilizer can harm your herbs, causing yellowing leaves, stunted growth, and even plant death. Here are some signs of over-fertilization:
- Yellowing or browning of leaves
- Burnt leaf tips and margins
- Excessive leaf drop
- Crusty residue on the soil surface
To correct over-fertilization, follow these steps:
- Stop fertilizing immediately.
- Flush the soil with water to remove excess nutrients.
- Remove damaged leaves to reduce plant stress.
- Check the fertilizer instructions and adjust the amount used.
Prevent over-fertilization by using fertilizer sparingly and monitoring your plants’ response. A balanced approach ensures your herbs thrive without the risk of nutrient overload.
Ph Imbalance
A pH imbalance can significantly affect herb growth. Different herbs require different pH levels for optimal growth. Here are some signs of pH imbalance:
- Discolored leaves
- Stunted growth
- Poor flowering
- Nutrient deficiencies
To identify and correct pH imbalances, follow these steps:
- Test the soil pH using a pH meter or test kit.
- Adjust pH levels as needed:
- For acidic soil (pH < 6.0), add lime.
- For alkaline soil (pH > 7.5), add sulfur or organic fertilizer
- Monitor pH levels regularly to maintain balance.
Maintaining the correct pH is crucial for nutrient uptake. Always test the soil before applying homemade fertilizers to ensure your herbs grow strong and healthy.
Watering Issues
Watering issues can also impact the effectiveness of homemade fertilizers. Both overwatering and underwatering can stress your herbs. Here’s how to identify and fix watering problems:
- Overwatering signs:
- Wilting, despite wet soil
- Yellowing leaves
- Root rot
- Underwatering signs:
- Dry, brittle leaves
- Wilting in dry soil
- Slow growth
To solve watering issues:
- Water the herbs when the top inch of soil is dry.
- Ensure proper drainage to prevent waterlogging.
- Use mulch to retain soil moisture.
Proper watering practices ensure that your homemade fertilizer can work effectively. Pay attention to your plants’ needs to keep them lush and healthy.
Frequently Asked Questions
What Are The Benefits Of Homemade Fertilizer for Herbs?
Homemade fertilizer is cost-effective, eco-friendly, and provides essential nutrients tailored to your herbs’ needs.
How Do I Make Compost Tea?
Steep compost in water for 24-48 hours. Strain and use the liquid to water your herbs.
Can I Use Eggshells As Fertilizer?
Crushed eggshells provide calcium, strengthen herb cell walls, and promote healthy growth.
What Kitchen Scraps Are Good Fertilizers?
Fruit peels, coffee grounds, and vegetable scraps enrich the soil with nitrogen, potassium, and phosphorus.
How Often Should I Fertilize Herbs?
Fertilize every 4-6 weeks during the growing season to ensure a consistent nutrient supply for optimal growth.
Is Fish Emulsion Good For Herbs?
Fish emulsion is excellent for herbs. It provides a balanced nutrient profile and promotes vigorous growth.
Can Banana Peels Help Herbs Grow?
Banana peels are rich in potassium, which supports root development and overall plant health when used as fertilizer.
Conclusion
Crafting your homemade fertilizer can be simple and effective. Your herbs will thrive with natural nutrients. Experiment with different ingredients to find the perfect mix. Sustainable gardening benefits both your plants and the environment. Start your journey to healthier, more vibrant herbs today.
Happy gardening!