Growing Campari tomatoes at home is both rewarding and straightforward. These small, flavorful tomatoes are perfect for salads and snacks.
Want to know how to grow Campari tomatoes thrive in warm conditions and need proper care? Start with healthy seeds or seedlings. Provide them with rich soil, plenty of sunlight, and regular watering. They grow best in containers or garden beds. Staking or caging helps support the plants as they grow.
Pruning the lower leaves can improve air circulation and prevent disease. Harvest them when they are bright red and firm. With the right attention, you can enjoy a bountiful crop of Campari tomatoes. Ready to get started? Follow these steps to grow your own delicious tomatoes at home.
How to Grow Campari Tomatoes: Choose the Right Seed
Related: [Guide] How to Grow Black Prince Tomatoes in Pots: Expert Tips & Tricks
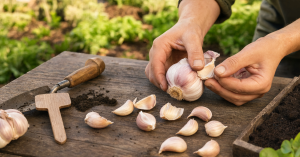
Growing Campari tomatoes can be a rewarding experience for any gardener. Choosing the right seeds is crucial for ensuring a bountiful harvest. The quality and type of seeds you select will influence the growth and yield of your Campari tomato plants. Let’s explore the types of Campari seeds and where to buy them.
Types of Campari Seeds
When it comes to Campari Tomato Care, selecting the right seeds is essential. There are several types of Campari seeds available, each with unique characteristics. Here are some common types:
- Organic Campari Seeds: These seeds are grown without synthetic pesticides or fertilizers. They are ideal for those practicing organic gardening.
- Heirloom Campari Seeds: These seeds come from plants that have been passed down through generations. They often have rich flavors and diverse genetic traits.
- Hybrid Campari Seeds: These are created by cross-pollinating different tomato varieties. They often have improved disease resistance and higher yields.
- GMO-Free Campari Seeds: These seeds have not been genetically modified. They are a good option for gardeners looking for natural cultivation techniques.
The table below summarizes the key characteristics of these seed types:
| Seed Type | Characteristics |
| Organic Campari Seeds | Grown without synthetic inputs, eco-friendly |
| Heirloom Campari Seeds | Rich flavors, diverse genetics, historical |
| Hybrid Campari Seeds | Improved resistance, higher yield, cross-pollinated |
| GMO-Free Campari Seeds | Natural, non-genetically modified |
Choosing the right type of seeds will depend on your specific needs and preferences. Whether you prefer organic methods or want high-yield plants, there’s a Campari seed type for you.
Related: [with Care Idea] How to Grow Cherry Tomatoes in Florida: Seeds, Soil, and Fertilizers
Where to Buy Seeds
Finding the best sources to buy your Campari Tomato Seeds is just as important as choosing the right type. Here are some reliable options:
- Local Garden Centers: Many local garden centers carry a variety of tomato seed varieties. This is a convenient option if you need seeds quickly.
- Online Seed Retailers: Websites like Burpee, Johnny’s Selected Seeds, and Baker Creek Heirloom Seeds offer a wide selection of seeds. They often provide detailed information on tomato cultivation techniques.
- Farmers’ Markets: Farmers’ markets can be a great place to find organic tomato seeds. You can also get valuable tomato gardening tips from experienced growers.
- Seed Exchanges: Seed exchanges allow you to trade seeds with other gardeners. This can be a good way to obtain heirloom or rare varieties of Campari tomato seeds.
Here are some recommended online seed retailers:
| Retailer | Specialty |
| Burpee | Wide variety, detailed growing guides |
| Johnny’s Selected Seeds | High-quality seeds, professional-grade tools |
| Baker Creek Heirloom Seeds | Heirloom varieties, rare seeds |
| Seed Savers Exchange | Heirloom and organic seeds, seed exchange program |
Purchasing seeds from reputable sources ensures you get high-quality seeds that will contribute to successful Campari Tomato Harvest. Whether you are planting Campari tomatoes for the first time or looking to expand your garden, these sources provide a variety of options to meet your needs.
Ideal Growing Conditions
Growing Campari tomatoes can be a rewarding experience. To achieve a bountiful harvest, it’s important to understand the ideal growing conditions. This includes specific needs for sunlight and soil. Meeting these needs will ensure healthy plants and delicious tomatoes.
Sunlight Requirements
Campari tomatoes thrive in full sunlight. They need at least 6-8 hours of direct sunlight each day. Without enough light, the plants may grow weak and produce fewer tomatoes. Here are some tips to ensure your tomatoes get enough sunlight:
- Plant tomatoes in a location that receives ample sunlight.
- Ensure there are no obstructions like trees or buildings that cast shadows.
- Consider using a reflective surface to increase light exposure.
Let’s look at a table that summarizes the sunlight requirements:
| Condition | Requirement |
| Daily Sunlight | 6-8 hours |
| Light Type | Direct sunlight |
| Plant Location | Open, unobstructed area |
Following these guidelines will help your Campari tomatoes get the sunlight they need to grow strong and healthy.
Soil Preferences
Campari tomatoes prefer well-drained, fertile soil. The soil should be rich in organic matter and have a pH level between 6.0 and 6.8. Here are some tips for preparing the soil:
- Test the soil pH and adjust it if needed.
- Add compost or aged manure to improve soil fertility.
- Ensure good drainage by mixing sand or perlite if the soil is too dense.
Below is a table that highlights the key soil preferences:
| Condition | Requirement |
| Soil pH | 6.0 – 6.8 |
| Soil Type | Well-drained, fertile |
| Organic Matter | High |
By preparing the soil properly, you create an ideal environment for your Campari tomatoes to flourish.
Planting Techniques
Growing Campari tomatoes can be rewarding. Their sweet and juicy flavor makes them a favorite. The key to success lies in proper planting techniques. By following these methods, you can ensure healthy, vibrant plants. Let’s explore the steps to get you started.
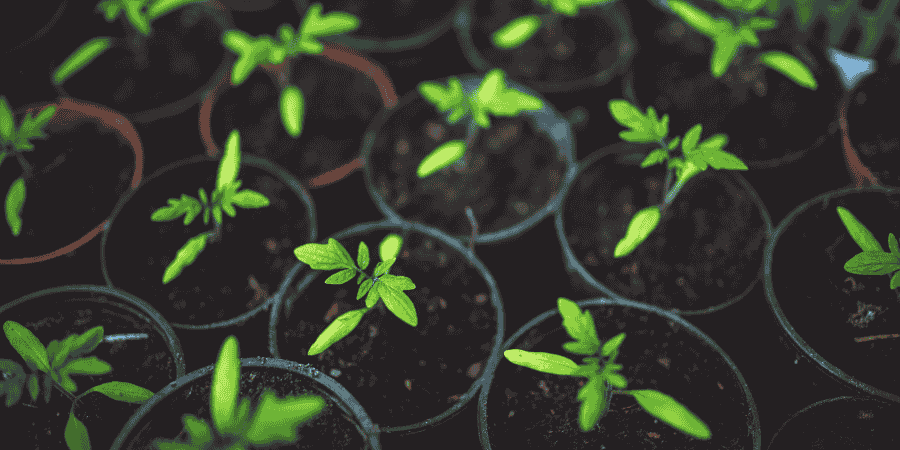
Seed Starting Indoors
Begin by selecting quality seeds. This is crucial for a good start. Use a seed-starting mix, as it is light and drains well. Fill your seed trays with this mix. Make sure to dampen the soil before planting.
Plant the seeds about 1/4 inch deep. Cover them lightly with soil. Keep the soil moist but not waterlogged. Place the trays in a warm area. The ideal temperature is between 70-75°F.
Using a grow light helps. Position it about 2-3 inches above the seedlings. Adjust as they grow. Provide 14-16 hours of light daily. A timer can be helpful for this.
Once the seedlings have two sets of true leaves, they are ready for transplanting. Before moving them, harden off the seedlings. This means gradually introducing them to outdoor conditions. Start with a few hours outside in a sheltered area. Gradually increase their time outside over a week.
Transplanting Outdoors
Choose a sunny spot in your garden for transplanting. Campari tomatoes need at least 6-8 hours of sunlight daily. Prepare the soil by adding compost or well-rotted manure. This enriches the soil with nutrients.
Space the plants 18-24 inches apart. This allows for adequate air circulation. Plant them deeper than they were in the pots. Bury the stem up to the first set of leaves. This encourages a strong root system.
Water the plants well after transplanting. Keep the soil consistently moist but not waterlogged. Mulch around the plants to retain moisture and suppress weeds. Use straw, hay, or grass clippings as mulch.
Supporting the plants is important. Use stakes, cages, or trellises. This prevents the branches from breaking and keeps the fruit clean. Regularly check for pests and diseases. Treat any issues promptly to keep the plants healthy.
Watering Practices
Growing Campari tomatoes can be a rewarding experience for any gardener. One of the critical aspects of nurturing these flavorful tomatoes is understanding proper watering practices. Correct watering ensures healthy growth and bountiful harvests. Below, we delve into the key elements of watering your Campari tomatoes.
Frequency And Amount
Watering your Campari tomatoes the right way is essential for their health. Here are some guidelines to help you:
Frequency:
- Water your Campari tomatoes once a week during cooler months.
- Increase to twice a week during hotter months.
- In extremely hot weather, check the soil moisture daily and water as needed.
Amount:
- Ensure the soil is moist but not soggy.
- Aim to provide around 1-2 inches of water per week.
- Use a drip irrigation system or soaker hose for consistent moisture.
Using a consistent watering schedule helps prevent issues like blossom end rot and cracking of the tomatoes. Keep in mind that the needs may vary depending on the climate, soil type, and the specific conditions of your garden. A moisture meter can be very helpful to monitor the soil’s moisture level.
Signs Of Overwatering
Overwatering can be detrimental to your Campari tomatoes. Here are some signs to watch out for:
Yellowing Leaves:
- Leaves turning yellow, especially the lower ones.
- Yellow leaves might also appear wilted or limp.
Root Rot:
- The roots may become black and slimy.
- Plants may appear stunted or fail to grow.
Mold and Fungi:
- White mold or fungi on the surface of the soil.
- Plants may develop blight or other fungal diseases.
To avoid overwatering, always check the soil before watering. Stick your finger about an inch into the soil. If it feels dry, it’s time to water. If it’s still moist, wait another day. It’s better to underwater slightly than to overwater.
Nutrient Management
Growing Campari tomatoes can be a rewarding experience for gardeners. Nutrient management is crucial for ensuring healthy plants and bountiful harvests. Proper nutrient management helps your tomatoes grow strong, resist diseases, and produce delicious fruits. Let’s explore how to manage nutrients effectively for Campari tomatoes.
Fertilizing Schedule
Establishing a regular fertilizing schedule is essential for the growth and productivity of Campari tomatoes. Start by understanding the soil’s nutrient content. A soil test can help you determine what nutrients are needed. Here is a basic fertilizing schedule to follow:
- Before Planting: Incorporate a balanced fertilizer (10-10-10) into the soil. Use about 2-3 pounds per 100 square feet.
- After Transplanting: Apply a starter solution high in phosphorus. This encourages root development.
- Early Growth Stage (4-6 weeks after transplanting): Use a balanced fertilizer. Apply 1-2 tablespoons of 10-10-10 per plant.
- Flowering Stage: Switch to a fertilizer high in potassium. This supports fruit development. Apply 1-2 tablespoons of 5-10-10 per plant.
- Fruiting Stage: Continue with the high-potassium fertilizer every 3-4 weeks until harvest.
Avoid over-fertilizing. Too much fertilizer can lead to excessive foliage and fewer fruits. Always water the plants after fertilizing to help nutrients reach the roots.
Organic Fertilizers Vs. Synthetic Fertilizer
Choosing between organic and synthetic fertilizers depends on your gardening preferences. Both options have their benefits and drawbacks.
Organic Fertilizers:
- Advantages:
- Improves soil structure
- Encourages beneficial microorganisms
- Slow-release nutrients
- Disadvantages:
- May be more expensive
- Slow to show results
- Requires larger quantities
Common organic fertilizers include compost, aged manure, bone meal, and fish emulsion. They are eco-friendly and sustainable.
Synthetic Fertilizers:
- Advantages:
- Quickly available nutrients
- Precise nutrient ratios
- Cost-effective
- Disadvantages:
- Can harm soil health
- Risk of over-fertilizing
- May cause nutrient runoff
Popular synthetic fertilizers include those with NPK ratios like 10-10-10 or 5-10-10. They provide immediate nutrient boosts.
Choose the type that fits your gardening style. Organic options are better for long-term soil health. Synthetic options are suitable for quick results and specific nutrient needs.
Pruning Strategies
Growing Campari tomatoes can be a rewarding experience. These tomatoes are known for their sweet and juicy flavor. To achieve the best results, proper pruning is essential. Pruning helps the plant focus its energy on producing delicious fruits. Here, we will discuss effective pruning strategies for healthy growth.
When To Prune
Timing is crucial for pruning Campari tomatoes. Pruning at the right time ensures healthy growth and abundant fruit production. Here’s a guide on when to prune:
- Early Stage: Start pruning when the plant is about 12-18 inches tall. Remove the small side shoots, also known as suckers, that grow between the main stem and the branches. This helps direct energy to the main stem.
- Flowering Stage: Prune the plant when it starts to flower. Focus on removing the lower leaves. This improves air circulation and reduces the risk of disease.
- Fruit Development Stage: Continue pruning during fruit development. Remove any yellowing or diseased leaves. This ensures that the plant’s energy is used for fruit production.
Use a clean, sharp pair of scissors or pruning shears to make clean cuts. Avoid tearing the plant, as this can cause damage and increase the risk of infection.
Techniques For Healthy Growth
Using the right pruning techniques promotes healthy growth and maximizes fruit production. Here are some effective techniques:
- Single Stem Pruning: Train the plant to grow a single main stem. Remove all side shoots and suckers regularly. This technique is ideal for small spaces and helps in easy maintenance.
- Multi-Stem Pruning: Allow the plant to grow two or three main stems. Pinch off the suckers below the first flower cluster. This technique can increase yield but requires more space and support.
- Topping: Once the plant reaches a desired height, pinch off the top of the main stem. This encourages the plant to focus on ripening existing fruits. It also prevents the plant from becoming too tall and unmanageable.
Regularly check the plant for any signs of disease or pests. Remove affected parts immediately to prevent the spread. Proper watering and fertilization also play a crucial role in the healthy growth of Campari tomatoes.
Here’s a simple table summarizing the pruning techniques:
| Technique | Description |
| Single Stem Pruning | Remove all side shoots and suckers. Ideal for small spaces. |
| Multi-Stem Pruning | Allow 2-3 main stems. Pinch off suckers below the first flower cluster. |
| Topping | Pinch off the top of the main stem. Focuses energy on ripening fruits. |
Incorporate these pruning strategies to ensure your Campari tomatoes grow healthy and produce bountiful fruits.
Pest And Disease Control
Growing Campari tomatoes can be a rewarding experience, but pests and diseases can pose significant challenges. Understanding how to manage these threats is crucial for a healthy and bountiful harvest. Effective pest and disease control involves identifying common pests and implementing preventive measures to protect your plants.
Common Pests
Campari tomatoes can attract a variety of pests. Here are some of the most common ones:
- Aphids: These small, soft-bodied insects feed on plant sap, causing leaves to curl and yellow.
- Tomato Hornworms: Large green caterpillars that can quickly defoliate a tomato plant.
- Whiteflies: Tiny white insects that suck sap from the underside of leaves, leading to wilting and stunted growth.
- Spider Mites: These tiny pests can cause stippling and yellowing of leaves, leading to leaf drop.
- Cutworms: Caterpillars that cut young plants at the base, often causing the plant to fall over.
Below is a table that summarizes the common pests and their impact on Campari tomatoes:
| Pest | Impact |
| Aphids | Yellowing leaves, stunted growth |
| Tomato Hornworms | Defoliation, reduced fruit production |
| Whiteflies | Wilting, stunted growth |
| Spider Mites | Stippling, yellowing, leaf drop |
| Cutworms | Cut young plants at the base |
Preventive Measures
Preventing pests is easier than dealing with an infestation. Here are some effective measures:
- Regular Inspection: Check your plants regularly for signs of pests. Early detection can prevent serious damage.
- Companion Planting: Plant basil, marigolds, or garlic near your tomatoes. These plants can repel many common pests.
- Proper Watering: Water at the base of the plant, not the leaves. Wet leaves can attract pests and diseases.
- Mulching: Use mulch to retain soil moisture and reduce weed growth. Mulch can also deter some pests.
- Natural Predators: Encourage beneficial insects like ladybugs and lacewings. They feed on many common pests.
Here is a table to summarize preventive measures:
| Measure | Description |
| Regular Inspection | Check plants for pests weekly |
| Companion Planting | Plant pest-repelling plants nearby |
| Proper Watering | Water at the base of the plant |
| Mulching | Use mulch to retain moisture |
| Natural Predators | Encourage beneficial insects |
Implementing these preventive measures can keep your Campari tomatoes healthy and reduce the risk of pest infestations.
Harvesting Tips
Growing Campari tomatoes can be a rewarding experience. They are known for their sweet taste and juicy texture. Harvesting them at the right time and in the right way ensures you get the best flavor and yield from your plants. Below are some tips to help you make the most of your Campari tomato harvest.
Identifying Ripeness
Knowing when your Campari tomatoes are ripe is crucial. Ripe tomatoes are essential for the best taste and texture. Here are some signs to look for:
- Color: Ripe Campari tomatoes are bright red. Avoid picking them when they are still green or have yellow patches.
- Feel: Gently squeeze the tomato. It should feel firm but yield slightly to pressure. Overly soft tomatoes may be overripe.
- Smell: A ripe tomato will have a sweet, earthy smell. If there is no smell, it may not be ready yet.
- Size: Campari tomatoes are typically medium-sized. If they have reached their typical size, they are likely close to ripeness.
Using these indicators, you can ensure you pick your tomatoes at the peak of their flavor. Timing is key. Regularly check your plants so you don’t miss the perfect moment.
Best Harvesting Practices
Proper harvesting techniques are important to avoid damaging the plant or the fruit. Follow these practices for the best results:
- Use Sharp Tools: Use a pair of sharp scissors or pruning shears. This helps avoid tearing the plant.
- Cut, Don’t Pull: Gently cut the stem close to the fruit. Pulling can damage the plant and other nearby fruits.
- Harvest in the Morning: The best time to harvest is early in the morning. The tomatoes will be cooler and firmer, reducing the risk of bruising.
- Handle with Care: Be gentle with the tomatoes. Place them in a basket or container to avoid bruising them.
- Check Regularly: Visit your garden every few days. Continuous checking ensures you pick tomatoes at their peak ripeness.
Following these practices helps maintain the health of your plants and ensures you get the best quality fruit. Happy harvesting!
Storing And Using
Campari tomatoes, known for their sweet and juicy flavor, are a delightful addition to any garden. Once harvested, proper storage and creative usage can ensure you enjoy these tomatoes to the fullest. This section will guide you through the best methods for storing your Campari tomatoes and offer some delicious recipe ideas.
Storage Methods
To keep your Campari tomatoes fresh and tasty, choose the right storage method. Consider the following tips:
- Room Temperature: For tomatoes that are not fully ripe, store them at room temperature. Place them stem-side down to prevent bruising.
- Refrigeration: Once fully ripe, store tomatoes in the refrigerator. This helps extend their shelf life. Consume within a week for the best taste.
- Freezing: For long-term storage, freeze your tomatoes. Blanch them first, then remove the skins and core. Place in airtight containers or freezer bags.
Here’s a table summarizing the storage methods:
| Storage Method | Ideal Duration |
| Room Temperature | 3-5 days |
| Refrigeration | Up to 1 week |
| Freezing | 6 months |
Recipe Ideas
Campari tomatoes are versatile and can be used in many dishes. Here are some simple and tasty recipe ideas:
- Tomato Salad: Slice Campari tomatoes and mix with mozzarella, basil, and a drizzle of olive oil. Add salt and pepper to taste.
- Bruschetta: Dice tomatoes and mix with garlic, basil, and olive oil. Spoon onto toasted bread slices for a quick appetizer.
- Tomato Sauce: Cook chopped tomatoes with garlic, onions, and herbs. Simmer until thickened and serve over pasta.
For a more structured guide, consider the following recipe:
Ingredients:
- 5 Campari tomatoes
- 1 garlic clove
- 1/4 cup olive oil
- Fresh basil leaves
- Salt and pepper to taste
Instructions:
- Dice tomatoes and place in a bowl.
- Mince garlic and add to tomatoes.
- Drizzle with olive oil and mix well.
- Tear basil leaves and add to the mixture.
- Season with salt and pepper.
- Let sit for 10 minutes to blend flavors.
These methods and recipes will help you make the most of your Campari tomatoes, from storing them properly to enjoying them in delicious meals.
Frequently Asked Questions
What Are Campari Tomatoes?
Campari tomatoes are small, juicy, and sweet. They are perfect for salads and snacking. They are often called cocktail tomatoes.
When To Plant Campari Tomatoes?
Plant Campari tomatoes in late spring. Ensure the last frost has passed. They need warm soil to thrive.
How Much Sunlight Do Campari Tomatoes Need?
Campari tomatoes need full sunlight. Aim for at least 6-8 hours of direct sunlight daily.
How Often To Water Campari Tomatoes?
Water Campari tomatoes regularly. Keep the soil consistently moist. Avoid waterlogging to prevent root rot.
Conclusion
Growing Campari tomatoes can be both rewarding and enjoyable. Follow these simple steps to ensure healthy plants. Regular watering and proper sunlight are crucial. Don’t forget to prune and support the plants. This will encourage better growth. Harvest tomatoes when they are ripe and red.
Enjoy the fresh, delicious taste of homegrown Campari tomatoes. Happy gardening!